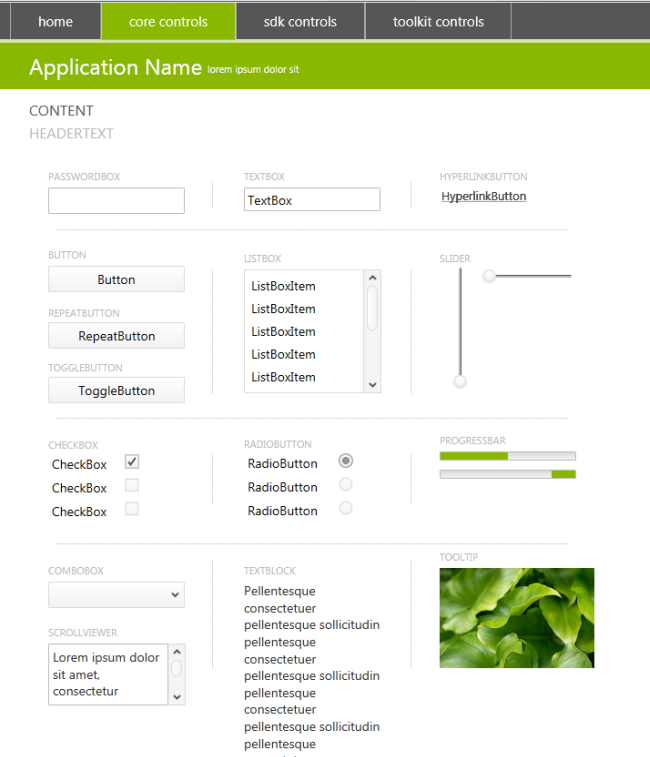
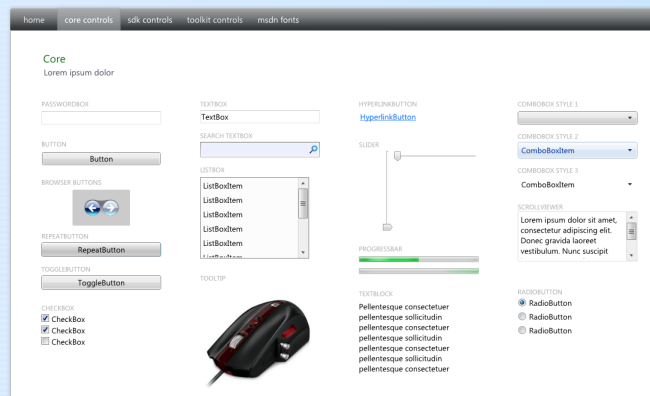
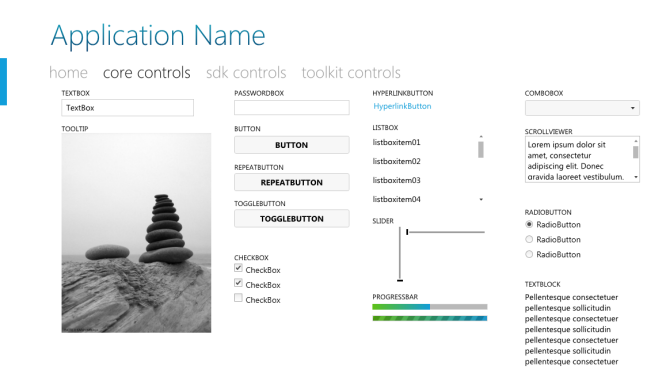
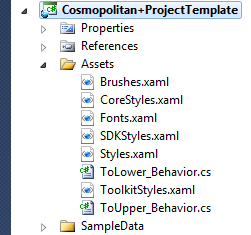
While working on some plugins for the new Seesmic Desktop Platform I got sick of copying and pasting some boiler plate code over and over.  I had created some helper templates for myself so that I could say File…New Seesmic Desktop Plugin and get everything I needed initially.  This weekend I had some time and formalized those templates into an easy-to-use installer for anyone to consume. 

NOTE: It is likely that Seesmic themselves will create developer project/item templates…these were for my own use and I shared them on the Seesmic Desktop Platform developer forum for anyone to benefit from (or ignore).  They are not the official templates from Seesmic.

Prior to VS2010 you could create what is called a Visual Studio Community Content Installer…which is a .VSI file that installs things like snippets, etc.  And actually you can still do that today.  The process is manual and involves a few XML manifest files, zipping up the contents and renaming it to .VSI (the VSI is just a ZIP format).  It isn’t hard, but isn’t painless as well – it’s a lot of manual steps.

Enter VS2010 and the Visual Studio SDK.  First, the items I am describing below require you to have the VS2010 SDK installed.  It is NOT installed by default.  Visual Studio 2010 has a file format called VSIX which is basically a Visual Studio Extension (VSX was already taken by Visio).  This extension format is intended to be a one-stop installer format for all things extensible.  Things like add-ins, etc.  But it can also be used for simple things like Item and Project template types.  Here’s what I did.

1. Starting the project

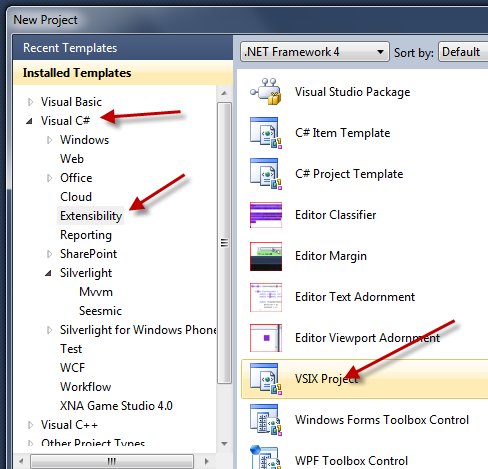
After you have VS2010 SDK installed, choose File…New VSIX Project

VSIX Project

Note that this is under a language area (C# or Visual Basic).  This is because there is some assumption that you are creating more than just a template deployer…but just note that.  In my instance it actually didn’t matter what language area I chose.

2. Removing ‘binary’ packages

By default the VSIX project thinks you are going to be creating code extensions and will package the project’s DLL and PDB files as a part of your extension.  If you are using this process as I was for template extensions, this is not necessary.  There is an easy way of avoiding this.  Open up the csproj file (or vbproj) you just created in notepad and add these lines in the XML file:

   1: <PropertyGroup>
   2:   <CopyBuildOutputToOutputDirectory>false</CopyBuildOutputToOutputDirectory>
   3:   <CopyOutputSymbolsToOutputDirectory>false</CopyOutputSymbolsToOutputDirectory>
   4: </PropertyGroup>

This tells the compiler to not package those types of files into our extension.  I put these below my last PropertyGroup statement in the file.  Save the proj file.  If you return to Visual Studio (and had the project open while making these edits in notepad) you’ll be alerted to reload the project, go ahead and reload baby.

3. Editing the manfiest information

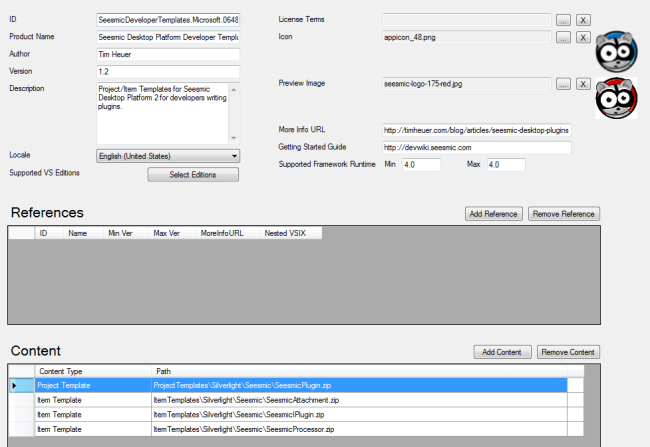
When you create the project it will open up with a dialog that is a visual editor to the core manifest.  This is where you will put your metadata as well as begin to add your content.  Here is a snapshot of mine:

VSIX Manifest Editor

Notice the simple metadata information (name, author, version, etc.).  This is important information that I’d highly recommend to include as you’ll see why in later steps.

Notice the Content area in the bottom.  This is where you’ll add your content.  If you have a blank project you will click the Add Content button and choose the type (in my case Project Template and Item Template) and browse to the file.  Note that this copies that file to this project…not a reference.  So if you change the file outside of this project, you’ll want to update it again.  Do this for each template type you want to deploy.

4. Understanding Path information for templates

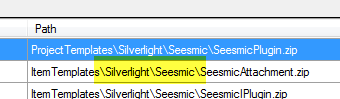
Notice my path of my templates:

template path data

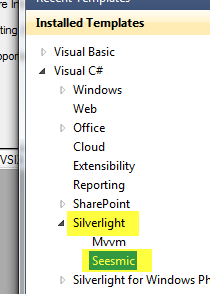
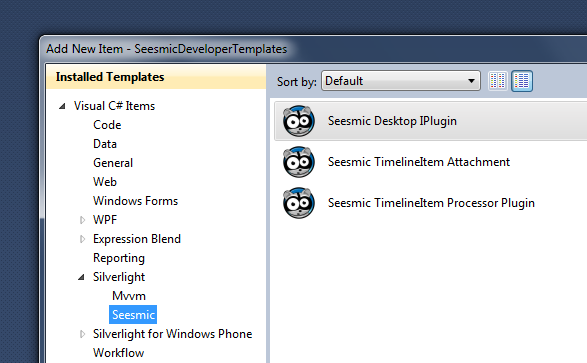
This is important because it will determine how the templates are structured in Visual Studio after the user installs them.  My path above results in this:

Installed Templates view

This enables my users to find it under Silverlight as well as the custom branch that I have specified.  This is a helpful tip to your users and provides a more professional look in my opinion.

5.  Building the VSIX file

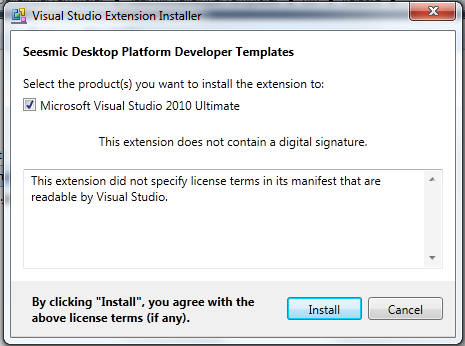
This step is easy.  F5.  It’s the same build process as any other project type.  The result is a VSIX file.  When the user double-clicks on that (and has Visual Studio installed) they’ll see your dialog:

VSIX Install Dialog

You could optionally digitally sign your VSIX file so the ‘unidentified publisher’ statement isn’t there.

6.  Making your VSIX Discoverable

This is the fun part.  Now that you have a standard Visual Studio Extension, you can make it readily available to any Visual Studio developer.  You could simply post a link to it on your blog, have the user download the VSIX and that is acceptable.  But you can also make it available in Visual Studio’s online gallery which then becomes searchable and seamlessly installable by end users.

Visit the Visual Studio Gallery page to start the process.  Notice the Upload button in the upper right area…that is where you start.  After authenticating with Windows Live ID, it is a 3 step process:

  1. Determine what type (Tool, Control, Template)
  2. Upload the VSIX
  3. Edit and annotate further criteria

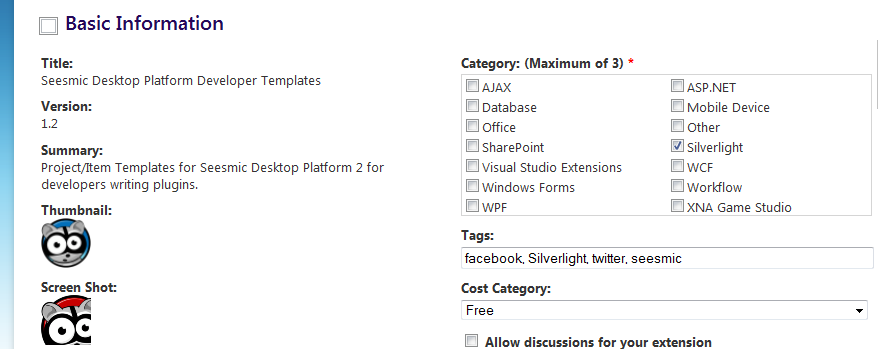
The first two steps are simple, in my case I chose Template, then uploaded my VSIX which goes through some steps of validation making sure it is a valid VSIX file.  The final step enables you to specify more data that is annotating your extension to make it more searchable.  Here was my page.

Visual Studio Gallery info page

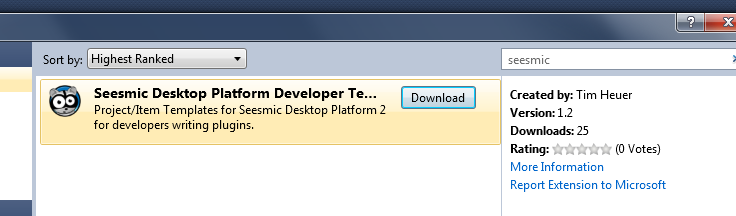
Notice the tags I added to help it be discoverable?  Now users can – from within Visual Studio 2010 – search and install extensions immediately:

Integrated extension search in Visual Studio

Any installed extensions show up in the Extension Manager (Tools menu) for easy disabling or uninstalling).

Summary

After this quick process I have a distributed package for my community as well as now have added templates to my development environment making it easy to create new extensions for Seesmic (my sample used here):

new project templates

It was fairly simple and I love that it is integrated into Visual Studio 2010 for everyone now!

Hope this helps!

May 1st is around the corner…time for an updated Windows 7 Smashing Magazine theme pack!

Thailand Kopipi

As you might expect with May the general theme is flowers and Mother’s day type things.  My favorites this time being the Thailand Kopipi (above) and the salt shore.  So here is your May 2010 Windows 7 Theme Packs for wallpapers – unfiltered and uncensored – about 40 wallpapers in all.

For details on these and to see past ones, visit the Smashing Magazine Windows 7 Theme information for the specifications I used for the theme pack as well as previous themes.  Want to participate and submit yours?  Join in!

As most of you know at MIX10, we released the first version of the Windows Phone 7 developer tools (which are free) targeting Silverlight and XNA development to the world.  This was a community technology preview (CTP) release and targeted Visual Studio 2010 RC at the time (which was the publically available version).  Since MIX10, Visual Studio 2010 has released in final form and the phone developer tools team has been working to get a working version finalized.

Windows Phone 7 Associated Press applicationToday is that day – we’ve just made available the Windows Phone Developer Tools CTP (April 2010 Refresh) (direct link download).  This is the installer that will install directly on your machine.  If you don’t have any version of the tools installed, this will install the Visual Studio express edition for Windows Phone 7 (free).  If you already have any released version of Visual Studio 2010, this will install the tools on top (integrated) into those.

This April refresh is still a CTP-quality and as such there are a few known issues with this latest release.  Our goal was at least to get a set of tools that would be available to enable people to move to Visual Studio 2010 release.  The known issues are documented in the release notes for the April 2010 refresh.  Specifically the first item as a known issue in the release notes:

Authenticode signed assemblies fail to load. When including Authenticode signed assemblies in your project, the application XAP will fail to deploy and run. This includes the use of Microsoft client libraries such as WCF Data Services, the Silverlight Toolkit, and 3rd party managed libraries. This issue will be resolved in a future release to permit the inclusion of Authenticode signed assemblies.

This might be annoying for some.  We will eventually get this fixed in a future release and understand this is annoying to some.  We apologize for this.  We do have a workaround for you in the manner of a PowerShell script (note: PowerShell is included in Windows 7, otherwise download a version here).  Here is the workaround (also noted on Charlie’s blog).

You will know if you hit this issue if your app deploys to the emulator but fails to actually run with a System.IO.FileLoadException then you are likely hitting this issue.

The PowerShell Script

Attached here is the PowerShell Script – right-click and save this somewhere known.

Download: wp7ctpfix.ps1

Using the script

Here’s the steps to using the script on the assemblies that will cause you issue (those signed assemblies).

  1. Copy the script to the folder containing the signed assemblies
  2. Open an elevated command prompt (this must be done in elevated mode) and enter powershell (type: powershell) – alternatively you could start powershell itself
  3. Run “.\wp7ctpfix.ps1 <your-signed-assembly-fully-qualified-path>” in the PowerShell window
  4. The script should show ‘operation succeeded’ if successful.
  5. A *new* assembly prefixed with “WP7_CTP_Fix_<signed-assembly>” in that directory

NOTE: If you get a warning that the script couldn’t be run, in PowerShell first run set-executionpolicy Unrestricted and then proceed (and reset back to Restricted if desired).

You’ll need to do this on all assemblies you reference that might be impacted.  NOTE: This does not alter the existing assembly, but rather creates a NEW COPY for you to use temporarily.

Using the fixed assemblies

Once you’ve completed the step above, you’ll have to change your project refrences:

  1. Expand the References section of your project and remove any of the problematic references
  2. Add a reference pointing to the newly created copies done in the step above

Using these fixed assemblies will only work in the emulator.  Since right now there is no means of application distribution for the masses, this isn’t an issue.  Again, we will be fixing this issue and it is only temporary – we have no announcements yet, however, on when the next update of the tools will be.  As noted in Charlie’s blog because this is a little bit of a ‘brute force’ technique, Microsoft is giving permission to do this with this fine print:

So as to enable you to load your applications on the pre-release version of the Windows Phone 7 operating system that is included with this April 2010 CTP of the Windows Phone Developer Tools, you may temporarily remove the signatures from any Microsoft-owned assemblies that you would otherwise be licensed to include in your programs, solely for the limited purpose of evaluating this CTP.  Upon the next pre-release of these Developer Tools or July 31, 2010, whichever is earlier, you must replace such signature-stripped assemblies with assemblies from which the signatures have not been removed.  Nothing in this statement should be interpreted as permission on behalf of owners of non-Microsoft assemblies.

What’s New in April refresh?

There are some new items in this refresh that we’ve changed/added which are noted in the What’s New topic in MSDN.  Here are some highlights:

And a few others – be sure to review the topic link above on MSDN.

What about Expression Blend?

Expression Blend 4 had a plugin that enabled Windows Phone 7 development as well.  This plugin has also been updated for this April 2010 refresh.  You must have the Expression Blend 4 RC installed first.

You can get the updated Blend plugin here:

Summary

Please read the release notes before installing the tools.  If you think any of the known issues will impact you significantly, please do  what you think is right (if that means sticking with the March CTP build on Visual Studio RC).  The bug above was discovered late in our plans.  We had to make a decision whether to hold up another potentially ‘weeks’ or release what we had in another CTP form.  In this case we chose the to release what we had to provide something that customers have been asking for. 

There are a few other known issues of this refresh that you should review, but also some new items as indicated above.

Other useful resources:

Hope this helps!


This work is licensed under a Creative Commons Attribution By license.

“This is the first generation of kids expected to live a shorter life than you.  Or...you guys can start kicking some ass.” – Jamie Oliver.

Jamie Oliver's Food Revolution

There’s been a show running on ABC recently…about 6 episodes.  It’s called Jamie Oliver’s Food Revolution.  It appears to have been taped during the fall of 2009 in Huntington, West Virginia (which evidently was selected because of high child obesity data).  The show absolutely has a bit of Hollywood, a ton of editing, but I don’t think anyone can doubt Jamie’s (and the producers, who also includes Ryan Seacrest) intention to get the word out about change in our food for our children.  Their target primarily was school lunches for kids.  This isn’t a review of the entire show, but I highly recommend watching the season finale of the show.  It tells a serious story that I don’t think is isolated to a small town in West Virginia.  In fact, as I look at my daughter (7-years old) and her school lunch offerings, I see the same things of food choices.

I’m a bit of a documentary buff.  I love controversial topics.  Perhaps that is why I’m drawn to this.  I am also a fan of things like Food, Inc., King Corn, and other food-based documentary.  If you haven’t seen these and want a perspective on where your food in the US comes from, watch them.  Are they one-sided?  Perhaps.  Are they factually inaccurate?  I don’t think so personally.  But it’s good information, controversial or not – as it caused me to think about the food I eat.

Several years ago my father had a heart attack.  His third in fact.  This one didn’t go well.  He went into intensive care and his heart was damaged beyond repair.  He needed immediate help.  For 8 months he had an artificial heart and had to live in Tucson Medical Center in a hospital room for this time.  You see, an artificial heart sounds ‘easy’ but it actually was an external ventricle system attached to what looked like a washing mashing.  He couldn’t walk without an engineer pushing this washing machine sized thing with him.  In a fortunate/unfortunate situations a heart was made available and my father is alive today because of a human heart transplant.  Truly a miracle.  His history in his family is one of obesity, high blood pressure, and poor eating.  And I’m the next :-0.

According to the CDC BMI indexes, I’m overweight and bordering on obesity.  Seeing that word ‘obese’ is frightening because I don’t at all consider myself obese.  This January I started to change that process.  I lost about 18 pounds.  Getting it off takes dedication and determination, but I did it.  Now keeping it off continues to be a tough challenge, but I recognize a healthier and better feeling as the pounds come off.

Now when I see Jamie’s show, it hits home a lot harder.  My kids Zane (4) and Zoe (7) are my only children and as I continue to grow as a parent.  Things like music lyrics and television shows or only half the battle.  My kids’ diets are a concern in my family.  Unfortunately I’m victim to the same things every parent is, being surrounded by hugely convenient options over healthy options.  Breakfast at my house?  Waffles.  Lunch for my son?  Usually chicken nuggets.  Frankly he doesn’t eat anything that isn’t orange.  My daughter is pretty picky as well. 

Jamie also had an opportunity to present at TED and actually won the TEDPrice for 2010.  His talk is worth watching.

If you are a parent, watch these shows (they are free on ABC.com or Hulu).  Like I said, sure there is some Hollywood action happening, but the message and reality behind school lunches is real.  See if you are the same parent that packs the brown bag lunch of crap like I do.  Is a hamburger at lunch going to kill your kid?  I don’t think so, but all things in moderation right?  We, as parents, need to help our children make the right food choices and provide a healthy lifestyle at home first as we know they won’t get it elsewhere.  It starts at home.  Period.

I’m grateful that Jamie and Ryan produced this Food Revolution show.  It was both entertaining and informative.  I hope that others can join in the ‘food revolution’ that Jamie brought awareness to in their own homes and communities.

Sorry for the distraction from the normal technology geekiness…but this ‘food revolution’ has struck a chord with me as an important thing to ensure I shared.  I’m going to try to start making changes at home.  I know it won’t be simple, I know it won’t be convenient, but I also know that my children’s health is MY responsibility.

A little bit of hidden gem in the Silverlight 4 release is the ability to modify the Authorization header in network calls.  For most, the sheer ability to leverage network credentials in the networking stack will be enough.  But there are times when you may be working with an API that requires something other than basic authentication, but uses the Authorization HTTP header.

The Details

Basically you just set the header value.  How’s that for details :-). 

Seriously though, here’s a snippet of code:

   1: WebClient c = new WebClient();
   2: c.Headers[HttpRequestHeader.Authorization] = "Auth header from same domain-browser stack";
   3: c.DownloadStringCompleted += ((s, args) =>
   4:     {
   5:         if (args.Error != null)
   6:         {
   7:             response.Text = args.Error.Message;
   8:         }
   9:         response.Text = args.Result;
  10:     });
  11: c.DownloadStringAsync(new Uri(http://localhost:4469/handler.ashx));

As you can see in the code is rather simple.  Prior to Silverlight 4 you’d receive an exception that setting the header isn’t possible…but now it is.  If you are using HttpWebRequest instead it would be just as simple:

   1: HttpWebRequest req = (HttpWebRequest)WebRequest.CreateHttp("http://localhost:4469/handler.ashx");
   2: req.Headers[HttpRequestHeader.Authorization] = "Auth header from same domain using HWR";
   3: req.BeginGetResponse((cb) =>
   4:     {
   5:         HttpWebRequest rq = cb.AsyncState as HttpWebRequest;
   6:         HttpWebResponse resp = rq.EndGetResponse(cb) as HttpWebResponse;
   7:  
   8:         StreamReader rdr = new StreamReader(resp.GetResponseStream());
   9:         string foo = rdr.ReadToEnd();
  10:         Dispatcher.BeginInvoke(() =>
  11:             {
  12:                 response.Text = foo;
  13:             });
  14:         rdr.Close();
  15:  
  16:     }, req);

That’s it.

The Support Matrix

As such this feature does have some restrictions for security reasons.  Basically the difference has to do with cross-domain calls.  Here’s the feature support matrix in the simplest terms:

Network Stack Used Domain Type Authorization Header Allowed
Browser (default) same domain Yes
ClientHttp same domain Yes
Browser (default) cross-domain Yes with policy
ClientHttp cross-domain Yes with policy

As you can see a cross-domain call of this (i.e., setting an Authorization header on a 3rd party site) would require that a valid clientaccesspolicy.xml be in place.  Here’s an example of a pretty liberal one:

   1: <?xml version="1.0" encoding="utf-8" ?>
   2: <access-policy>
   3:     <cross-domain-access>
   4:         <policy>
   5:             <allow-from http-request-headers="Content-Type,Authorization">
   6:                 <domain uri="*"/>
   7:             </allow-from>
   8:             <grant-to>
   9:                 <resource include-subpaths="true" path="/"/>
  10:             </grant-to>
  11:         </policy>
  12:     </cross-domain-access>
  13: </access-policy>

I should note that when I mean ‘pretty liberal’ this means that the above makes all your resources available to all Silverlight clients.  But pay attention to the http-request-headers section.  Notice the addition of the Authorization header (Content-Type is default always).  By adding this you would be able to have a cross-domain Authorization header writing ability.  Without it you’d see a security exception.  And remember, the policy files exist on the destination endpoint and not in your app.  To demonstrate this, here’s my quick sample application output:

Auth header sample app output

You can download the code for this sample tester application here: Authheaders.zip

Summary

Hopefully this is good news to some developers.  Now with Silverlight 4 we have network credentials support and the ability to use the Authorization header when needed for other purposes.  It’s a little hidden gem that frankly could have been better called out in the docs a bit.

Hope this helps!