You’ve written your service. You’ve written your Silverlight application. You Add Service Reference to your application and got the client proxy code. Your app ‘works on your machine’ and you push it out.
FAIL.
NotFound.
Crap. You forgot that your service reference had your local URI endpoint in there and when you moved it to staging and/or production it failed. You start cursing Microsoft and the Silverlight team and add to the threads in the forums or perhaps initiate a new wishlist item for the team and throw it out on Twitter and encourage votes.
It seems this is still a common frustration and people are trying to solve it in different ways. I’m going to throw out what is my preferred mechanism and add some additional tips and tricks here that hopefully some are using.
The Setup
Here’s the setup. You have a Silverlight application and a web service. To keep it simple I started with File…New Silverlight Application – kept the web project there. I added a Silverlight-enabled WCF Service to my web project with this following code:
1: [OperationContract]
<pre class="alteven"><span id="lnum2" class="lnum"> 2:</span> <span class="kwrd">public</span> <span class="kwrd">string</span> SayHello()</pre>
<pre class="alteven"><span id="lnum3" class="lnum"> 3:</span> {</pre>
<pre class="alteven"><span id="lnum4" class="lnum"> 4:</span> <span class="rem">// Add your operation implementation here</span></pre>
<pre class="alteven"><span id="lnum5" class="lnum"> 5:</span> <span class="kwrd">return</span> <span class="str">"Hello World [DEVELOPMENT]"</span>;</pre>
<pre class="alteven"><span id="lnum6" class="lnum"> 6:</span> }</pre>
I then added 2 more empty ASP.NET Web Application projects to my solution, added a single Silverlight-enabled WCF Service to each one of them with the identical code, changing only the return string to PRODUCTION or STAGING to differentiate the response. I called one project ProductionService and the other StagingService to simulate a production and staging environment. I then added (because it wouldn’t work otherwise in my test setup) a clientaccesspolicy.xml file to the production/staging service projects.
NOTE: You may not have to do this clientaccesspolicy.xml setup. This was only because I deployed the Silverlight app only to one web project, not others. This may not be required for you. See step below on Silverlight App in Same Web Project as Service section on why.
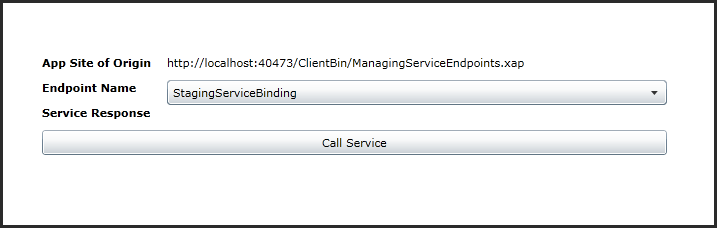
I’ve added some rudimentary XAML to the app to basically show the current default service that will be used (with the option to change it) and the response code:
Now to explain what I’ve done/recommend.
The ServiceReferences.clientconfig ‘magic’
When you add a service reference via the Add Service References option in Visual Studio, you get a new file in your Silverlight application called ServiceReferences.clientconfig. This contains the binding and endpoint configurations for the service you just referenced. Here’s where you can change some things up.
By default it adds the configuration for the literal endpoint you just referenced (think absolute URI here…most of the time in development this may be localhost). The file isn’t fixed though and you can add your other configurations there as well. Here’s my initial updated config file with the addition of the production and staging URI endpoints.
1: <configuration>
<pre class="alteven"><span id="lnum2" class="lnum"> 2:</span> <span class="kwrd"><</span><span class="html">system.serviceModel</span><span class="kwrd">></span></pre>
<pre class="alteven"><span id="lnum3" class="lnum"> 3:</span> <span class="kwrd"><</span><span class="html">bindings</span><span class="kwrd">></span></pre>
<pre class="alteven"><span id="lnum4" class="lnum"> 4:</span> <span class="kwrd"><</span><span class="html">customBinding</span><span class="kwrd">></span></pre>
<pre class="alteven"><span id="lnum5" class="lnum"> 5:</span> <span class="kwrd"><</span><span class="html">binding</span> <span class="attr">name</span><span class="kwrd">="CustomBinding_HelloWorldService"</span><span class="kwrd">></span></pre>
<pre class="alteven"><span id="lnum6" class="lnum"> 6:</span> <span class="kwrd"><</span><span class="html">binaryMessageEncoding</span> <span class="kwrd">/></span></pre>
<pre class="alteven"><span id="lnum7" class="lnum"> 7:</span> <span class="kwrd"><</span><span class="html">httpTransport</span> <span class="attr">maxReceivedMessageSize</span><span class="kwrd">="2147483647"</span> <span class="attr">maxBufferSize</span><span class="kwrd">="2147483647"</span> <span class="kwrd">/></span></pre>
<pre class="alteven"><span id="lnum8" class="lnum"> 8:</span> <span class="kwrd"></</span><span class="html">binding</span><span class="kwrd">></span></pre>
<pre class="alteven"><span id="lnum9" class="lnum"> 9:</span> <span class="kwrd"><</span><span class="html">binding</span> <span class="attr">name</span><span class="kwrd">="StagingServiceBinding"</span><span class="kwrd">></span></pre>
<pre class="alteven"><span id="lnum10" class="lnum"> 10:</span> <span class="kwrd"><</span><span class="html">binaryMessageEncoding</span> <span class="kwrd">/></span></pre>
<pre class="alteven"><span id="lnum11" class="lnum"> 11:</span> <span class="kwrd"><</span><span class="html">httpTransport</span> <span class="attr">maxReceivedMessageSize</span><span class="kwrd">="2147483647"</span> <span class="attr">maxBufferSize</span><span class="kwrd">="2147483647"</span> <span class="kwrd">/></span></pre>
<pre class="alteven"><span id="lnum12" class="lnum"> 12:</span> <span class="kwrd"></</span><span class="html">binding</span><span class="kwrd">></span></pre>
<pre class="alteven"><span id="lnum13" class="lnum"> 13:</span> <span class="kwrd"><</span><span class="html">binding</span> <span class="attr">name</span><span class="kwrd">="ProductionServiceBinding"</span><span class="kwrd">></span></pre>
<pre class="alteven"><span id="lnum14" class="lnum"> 14:</span> <span class="kwrd"><</span><span class="html">binaryMessageEncoding</span> <span class="kwrd">/></span></pre>
<pre class="alteven"><span id="lnum15" class="lnum"> 15:</span> <span class="kwrd"><</span><span class="html">httpTransport</span> <span class="attr">maxReceivedMessageSize</span><span class="kwrd">="2147483647"</span> <span class="attr">maxBufferSize</span><span class="kwrd">="2147483647"</span> <span class="kwrd">/></span></pre>
<pre class="alteven"><span id="lnum16" class="lnum"> 16:</span> <span class="kwrd"></</span><span class="html">binding</span><span class="kwrd">></span></pre>
<pre class="alteven"><span id="lnum17" class="lnum"> 17:</span> <span class="kwrd"></</span><span class="html">customBinding</span><span class="kwrd">></span></pre>
<pre class="alteven"><span id="lnum18" class="lnum"> 18:</span> <span class="kwrd"></</span><span class="html">bindings</span><span class="kwrd">></span></pre>
<pre class="alteven"><span id="lnum19" class="lnum"> 19:</span> <span class="kwrd"><</span><span class="html">client</span><span class="kwrd">></span></pre>
<pre class="alteven"><span id="lnum20" class="lnum"> 20:</span> <span class="kwrd"><</span><span class="html">endpoint</span> <span class="attr">address</span><span class="kwrd">="http://localhost:40473/HelloWorldService.svc"</span></pre>
<pre class="alteven"><span id="lnum21" class="lnum"> 21:</span> <span class="attr">binding</span><span class="kwrd">="customBinding"</span> <span class="attr">bindingConfiguration</span><span class="kwrd">="CustomBinding_HelloWorldService"</span></pre>
<pre class="alteven"><span id="lnum22" class="lnum"> 22:</span> <span class="attr">contract</span><span class="kwrd">="HelloServices.HelloWorldService"</span> <span class="attr">name</span><span class="kwrd">="CustomBinding_HelloWorldService"</span> <span class="kwrd">/></span></pre>
<pre class="alteven"><span id="lnum23" class="lnum"> 23:</span> <span class="kwrd"><</span><span class="html">endpoint</span> <span class="attr">address</span><span class="kwrd">="http://localhost:40848/HelloWorldService.svc"</span></pre>
<pre class="alteven"><span id="lnum24" class="lnum"> 24:</span> <span class="attr">binding</span><span class="kwrd">="customBinding"</span> <span class="attr">bindingConfiguration</span><span class="kwrd">="StagingServiceBinding"</span></pre>
<pre class="alteven"><span id="lnum25" class="lnum"> 25:</span> <span class="attr">contract</span><span class="kwrd">="HelloServices.HelloWorldService"</span> <span class="attr">name</span><span class="kwrd">="StagingServiceBinding"</span> <span class="kwrd">/></span></pre>
<pre class="alteven"><span id="lnum26" class="lnum"> 26:</span> <span class="kwrd"><</span><span class="html">endpoint</span> <span class="attr">address</span><span class="kwrd">="http://localhost:40849/HelloWorldService.svc"</span></pre>
<pre class="alteven"><span id="lnum27" class="lnum"> 27:</span> <span class="attr">binding</span><span class="kwrd">="customBinding"</span> <span class="attr">bindingConfiguration</span><span class="kwrd">="ProductionServiceBinding"</span></pre>
<pre class="alteven"><span id="lnum28" class="lnum"> 28:</span> <span class="attr">contract</span><span class="kwrd">="HelloServices.HelloWorldService"</span> <span class="attr">name</span><span class="kwrd">="ProductionServiceBinding"</span> <span class="kwrd">/></span></pre>
<pre class="alteven"><span id="lnum29" class="lnum"> 29:</span> <span class="kwrd"></</span><span class="html">client</span><span class="kwrd">></span></pre>
<pre class="alteven"><span id="lnum30" class="lnum"> 30:</span> <span class="kwrd"></</span><span class="html">system.serviceModel</span><span class="kwrd">></span></pre>
<pre class="alteven"><span id="lnum31" class="lnum"> 31:</span> <span class="kwrd"></</span><span class="html">configuration</span><span class="kwrd">></span></pre>
Notice the endpoint names: CustomBinding_HelloWorldService, StagingServiceBinding, ProductionServiceBinding. The first was created for me by VS – hence the awesome hugely unhelpful name :-). By default, if you added this code in your Silverlight application:
1: HelloWorldServiceClient client = new HelloWorldServiceClient();
Then it will be using the default endpoint it creates (which would only be one of them unless you add custom ones like I did above).
Initializing the Service with different endpoints
Now that you know that the client config file can have multiple configuration endpoints, how would you use them? Simple. If you take a look at the proxy code that gets generated for you when you Add Service Reference (this is in the Reference.cs file when you use the ‘show all files’ option in VS) you’ll notice that the constructor for HelloWorldService is overloaded to allow and endpoint configuration, or optionally explicit binding/endpoint address information. It’s the former that will make this easier for you.
Take our above ServiceReferences.clientconfig modifictation. Let’s say we wanted to work with the staging service, we could now simply instantiate with:
1: HelloWorldServiceClient client = new HelloWorldServiceClient("StagingServiceBinding");
In fact, I might argue that you should never use the default constructor. Being more explicit leads to easier code to read/track in my opinion. You don’t expect to be on this project for the rest of your life do you? I didn’t think so…make it easier on the next developer that has to come behind you and fix your bugs enhance the code to add functionality and be explicit.
Being Dynamic about your Endpoint Initialization
Obviously you don’t want to hard-code various endpoint names in your instantiation of the service proxies. In fact, you may be struggling because you may push your code out via automated build servers and you don’t want to have to build the XAP, then change something, blah blah. This is where conditional compilation can help. For instance, here’s how I have the code in this project:
1: string _endpointName = "RelativeBinding";
<pre class="alteven"><span id="lnum2" class="lnum"> 2:</span> </pre>
<pre class="alteven"><span id="lnum3" class="lnum"> 3:</span> <span class="preproc">#if</span> PRODUCTION</pre>
<pre class="alteven"><span id="lnum4" class="lnum"> 4:</span> _endpointName = <span class="str">"ProductionServiceBinding"</span>;</pre>
<pre class="alteven"><span id="lnum5" class="lnum"> 5:</span> <span class="preproc">#endif</span></pre>
<pre class="alteven"><span id="lnum6" class="lnum"> 6:</span> </pre>
<pre class="alteven"><span id="lnum7" class="lnum"> 7:</span> <span class="preproc">#if</span> STAGING</pre>
<pre class="alteven"><span id="lnum8" class="lnum"> 8:</span> _endpointName = <span class="str">"StagingServiceBinding"</span>;</pre>
<pre class="alteven"><span id="lnum9" class="lnum"> 9:</span> <span class="preproc">#endif</span></pre>
<pre class="alteven"><span id="lnum10" class="lnum"> 10:</span> </pre>
<pre class="alteven"><span id="lnum11" class="lnum"> 11:</span> HelloWorldServiceClient client = <span class="kwrd">new</span> HelloWorldServiceClient(_endpointName);</pre>
Now I just have to make sure that my compile tasks add those conditional flags. This is relatively simple. You could use Visual Studio’s Configuration Build Manager to create new profiles, or you could also customize an MSBuild task to append those constants. It is simple and there are plenty of resources to help you here. For my project I simply customized (added) new configuration profiles in Visual Studio and have been manually switching them to test.
Silverlight App in Same Web Project as Service
But wait, there’s more!
If you have a simpler solution where your service is being served up in the same web application/site as your Silverlight application, then you have a simpler solution using Silverlight 4. Just to clarify, what I mean by this is that your app - let’s say http://foo.com/clientbin/myapp.xap is a part of the same web application http://foo.com which serves up the service you are calling http://foo.com/helloworldservice.svc.
Good news for you if you are using Silverlight 4. You can now use relative path information for service references! Let’s say your XAP is in /ClientBin/MyApp.xap and your service is in the same root location as the ClientBin folder at /HelloWorldService.svc. This means that “../HelloWorldService.svc” will work! I’d recommend still being explicit in your code so that it helps those come behind you. In my client config file I added a “RelativeBinding” configuration:
1: <endpoint address="../HelloWorldService.svc"
<pre class="alteven"><span id="lnum2" class="lnum"> 2:</span> <span class="attr">binding</span><span class="kwrd">="customBinding"</span> <span class="attr">bindingConfiguration</span><span class="kwrd">="RelativeBinding"</span></pre>
<pre class="alteven"><span id="lnum3" class="lnum"> 3:</span> <span class="attr">contract</span><span class="kwrd">="HelloServices.HelloWorldService"</span> <span class="attr">name</span><span class="kwrd">="RelativeBinding"</span> <span class="kwrd">/></span></pre>
and then in my code I can initiate it like I’ve done above using the named configuration. But notice in the configuration I used ../HelloWorldService.svc as the URI for the service endpoint. Assuming my staging and production follow the same paths, I don’t have to worry about conditional compilation, etc. and can push these out in the various environments.
Code Specific Endpoints to hide your configurations
In theory if your solution can use the relative binding scenario described above there is not too much to worry about as far as revealing too much. However if you are using the other method about adding multiple configurations to your ServiceReferences.clientconfig file you should be aware that this file is compiled as a resource and could show others your staging/dev URIs that you may not want. This might be a subtle by-product of getting added benefit to making the process easier though but you should be aware of these capabilities since tools like Silverlight Spy and Reflector could enable someone to look at your resource files.
You could by pass the client config named endpoints mechanism and use conditional compilation with explicit code-created endpoints. Using the conditional statements as shown above, only the code that meets the condition will be compiled into IL. Thus decompilation doesn’t show the other #if options. So in Reflector or other tools you’d only see what was output. Given this you could be even more aboslutely explicit and do something like this:
1: BasicHttpBinding binding = new BasicHttpBinding();
<pre class="alteven"><span id="lnum2" class="lnum"> 2:</span> EndpointAddress endpoint;</pre>
<pre class="alteven"><span id="lnum3" class="lnum"> 3:</span> </pre>
<pre class="alteven"><span id="lnum4" class="lnum"> 4:</span> <span class="preproc">#if</span> PRODUCTION</pre>
<pre class="alteven"><span id="lnum5" class="lnum"> 5:</span> _endpointName = <span class="str">"ProductionServiceBinding"</span>;</pre>
<pre class="alteven"><span id="lnum6" class="lnum"> 6:</span> endpoint = <span class="kwrd">new</span> EndpointAddress(<span class="str">"http://myproductionserver.com/HelloWorldService.svc"</span>);</pre>
<pre class="alteven"><span id="lnum7" class="lnum"> 7:</span> <span class="preproc">#endif</span></pre>
<pre class="alteven"><span id="lnum8" class="lnum"> 8:</span> </pre>
<pre class="alteven"><span id="lnum9" class="lnum"> 9:</span> <span class="preproc">#if</span> STAGING</pre>
<pre class="alteven"><span id="lnum10" class="lnum"> 10:</span> _endpointName = <span class="str">"StagingServiceBinding"</span>;</pre>
<pre class="alteven"><span id="lnum11" class="lnum"> 11:</span> endpoint = <span class="kwrd">new</span> EndpointAddress(<span class="str">"http://mySTAGING.com/HelloWorldService.svc"</span>);</pre>
<pre class="alteven"><span id="lnum12" class="lnum"> 12:</span> <span class="preproc">#endif</span></pre>
<pre class="alteven"><span id="lnum13" class="lnum"> 13:</span> </pre>
<pre class="alteven"><span id="lnum14" class="lnum"> 14:</span> HelloWorldServiceClient client = <span class="kwrd">new</span> HelloWorldServiceClient(binding, endpoint);</pre>
Using this conditional compilation method you’re doing a bit more ‘hard-coding’ than relying on changing configuration and not code, but it might be more suitable to your liking. Sure, this can still be decompiled, but it would only reveal the endpoint you already will be using (which anyone could see anyway just watching HTTP traffic).
Summary
Managing your endpoints doesn’t have to be difficult. Hopefully these simple ways give you an idea of the options you can use. Can we do better in helping manage this easier? I think so. And I know we’re thinking about it as well.
You can download my complete code sample for this application here: ManagingServiceEndpoints.zip.
Hope this helps! (oh and hat-tip to Shawn who wrote about this for SL2…I’ve just expanded on the same idea going deeper and providing some updates for Silverlight 4)

