Installing Silverlight applications without the browser involved
One of the features we are introducing in Silverlight 4 is a ‘silent install’ mechanism for out-of-browser applications. Currently every out-of-browser application (trusted or not) starts from an in-browser mechanism. In some instances where you want to deploy the app via managed desktop software or perhaps via CD-ROM, you don’t want to have to tell the user to start on an HTML page first.
Now I’m not going to write here about the merits of why you might want to do this other than to point out what I believe to be the 2 prominent scenarios: managed desktop deployment and CD/DVD distribution. I know some of you might be thinking Well if it is a managed desktop environment, why not just use WPF then? – and I would pose the same question to the customer as well first. But again, this post is to merely outline the capabilities and I’ll let you all debate the reasons :-)
The function still requires the Silverlight plugin to be installed (and requires Silverlight 4). It would also require the ability to install out-of-browser applications (there is a possibility for an administrator to disable this feature). Given those two requirements, the key tool at your disposal is sllauncher.exe. This is installed with the plugin and is located at %ProgramFiles%\Microsoft Silverlight on the machine.
NOTE: The features I’m describing here are for Windows machines. Out-of-browser applications on OSX are actually deployed as ‘apps’ (.app) versus how just the XAP is deployed on a Windows machine. I’m investigating how to do something similar here with scripting on OSX, but I’m unfortunately not a Mac developer :-).
Let’s take a look at the required steps and a scenario.
The Setup
You’ll need to ensure that the plugin is installed as I mentioned earlier. You’ll also want to have a copy of the XAP handy that you’ll want to be installing. This would be the main XAP and would be the same one that would be in the Source parameter of the <object> tag where you normally would host this.
NOTE: Because “Program Files” is different on 32- and 64-bit machines you’ll want to make sure your script/installer can handle the determination of where the sllauncher.exe program will be. Since it isn’t a native 64-bit app, it will be in “Program Files (x86)” on a 64-bit machine. This sometimes can cause confusion because the %ProgramFiles% environment variable on 64-bit is the native program files directory and *not* the x86 one.
Your Silverlight XAP will already have to have been configured for out-of-browser and have the appropriate manifest information within it.
Once you have those you can move on to understanding the parameters.
The Options for Install
The sllauncher.exe program for install require at a minimum 2 options and I’ll suggest that you always use all 4 I will describe here.
/install:”path-toXAP-File” – this is the first and points to the XAP file you are wanting to install. This might be on a network share, on the CD, or in an installer. This is required.
/origin:”URI-to-origin” – this is the ‘origin’ of the XAP and is required. Even though you might not be using auto-update features, etc. you must set this. I actually recommend being smart about it and having the XAP on a real URI endpoint as well so that your origin is actually real.
/shortcut:desktop+startmenu – while this is optional, it actually seems silly not to include at least one – or your users will have a hard time launching your application! You can use: desktop, startmenu, or desktop+startmenu (my recommendation).
/overwrite – this option confirms the XAP you are installing will overwrite any existing version currently there. This is optional, but again, I think you should use it.
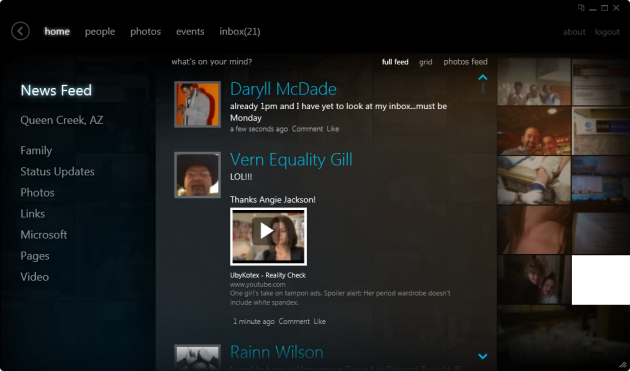
Let’s assume the following scenario using the Silverlight Client for Facebook application as an example. I have the XAP (Silverface.xap) that I want to deploy. I would use the following command:
1: "%ProgramFiles%\Microsoft Silverlight\sllauncher.exe"
2: /install:"Silverface.xap"
3: /origin:"http://www.silverlight.net/content/samples/apps/facebookclient/ClientBin/Silverface.xap"
4: /shortcut:desktop+startmenu /overwrite
This assumes that I’m calling this command from where the Silverface.xap is currently. Notice that the origin parameter points to the XAP origin and not the site hosting it. This is important. This above command would install the app and create shortcuts.
Automatically Launching the App
So what if you wanted to also automatically launch the app after installing (i.e., the CD/DVD ‘autorun’ scenario). You again would use sllauncher.exe to do this for you after you’ve installed the app. Using our same sample above here would be the command:
1: "%ProgramFiles%\Microsoft Silverlight\sllauncher.exe"
2: /emulate:"Silverface.xap"
3: /origin:"http://www.silverlight.net/content/samples/apps/facebookclient/ClientBin/Silverface.xap"
4: /overwrite
Notice the emulate command. This is the launcher. Now you’ll notice that this isn’t the same command-line options if you looked at an installed applications’ created shortcuts. Because the folder where the XAP gets installed is pretty random, we use the origin as the hint to the sllauncher.exe program to find the right app for us and start it up. I’ve found that using /overwrite will also give a more consistent behavior.
Uninstalling the App
What if now you want to uninstall the app? Perhaps the managed desktop admins deprecate an application or you want the CD/DVD experience to be a non-transient one and clean up when done. The command again is simple:
1: "%ProgramFiles%\Microsoft Silverlight\sllauncher.exe"
2: /uninstall
3: /origin:http://www.silverlight.net/content/samples/apps/facebookclient/ClientBin/Silverface.xap
Instead of the install parameter you use the uninstall parameter. Again, notice the use of the origin parameter – this is critical in all these tasks. The above command would remove the application and essentially does the same thing as the right-click Remove this application context menu option in Silverlight.
Using these commands in Installers
While I think those that actually have a need for this option will be using scripts and batch files, I do think some may want to include this in an installer experience. The only option I can see for this is because you are also deploying some additional items along with your XAP (perhaps assets to the user’s document store that the app will use later like plugins or something). Other than that if you are creating an installer simply to wrap the above methods, it might not seem wise.
Why, you ask? Well if you think about it, your installer itself will stamp an entry into Windows as an installed application and Silverlight will also stamp an entry. In our Facebook example, the Add/Remove Programs would show 2 “Silverlight for Facebook” entries (assuming we named our installer that as well). This would likely confuse the user. I’m not saying it isn’t impossible to do this nor is it difficult to manage, I just think it looks odd.
Regardless, if you are using something like InstallShield (FYI look for InstallShield LE in Visual Studio 2010…it’s very good) or the Visual Studio Setup projects, you can include a Custom Action to these installers. The process would be a custom action *after* the install is complete because you need to locate the XAP to install. Most setup programs are easy to use and provide pre-configured platform-specific environment variables you can use to map to things like the correct Program Files directory.
In the ideal situation you’re batch file/installer should check for the presence of Silverlight (and the correct version). These can be done using file path verification or registry checking, both of which are outlined in the deployment guide whitepaper.
What about redistribution of Silverlight? Right now we do not have broad redistribution rights for Silverlight. You will still need to point users to where they can get the plugin so that they can be presented with the EULA and get the correct version for their platform.
If you do use the installer route, make sure that you account for clean un-installations as well!
Other insights and summary
You may be asking yourself if the user will be prompted here to install the application? The answer is no. Since this is essentially a command-line execution, the trust is implied here. The user first has to knowingly type the command (not likely) or knowingly execute your install mechanism (batch file, installer, whatever). These commands cannot be automatically run from the browser, for example. For managed desktops, sure, these may be silently installed. This is intended because in a managed desktop environment the software is, well, managed. An elevated or normal-privileged application will install just the same using these methods.
As to the shortcuts (the /shortcut parameter being optional). I think we’re going to fix that in some update. Again, it’s a bit foolish to not provide one so consider it required :-).
If you find yourself in a situation needing this, hopefully it will come in useful. I really think this is a helpful tool, but also a niche tool. Those of you creating general consumer applications/sites will not benefit here really because you’ll likely start with an in-browser instance anyway. But for those using managed desktop environments, or thinking about CD ‘autorun’ type situations, hopefully this information will come in useful.