Silverlight Media Framework 2 released–integrate with Live Writer
- | Posted in
- silverlight
- codeplex
- media
- smf
Yesterday (7-Jul-2010), the Silverlight Media Framework v2 was released on Codeplex (yeah, it’s Open Source). If you aren’t familiar with it, it is a Silverlight framework encapsulating the best practices for media playback for Silverlight applications. It is both a framework and, in v2, they also provided compiled simple player XAPs that you can just drop in HTML. If you are building apps, you’ll want to take a look at the framework in more detail, but if you want a solid media player experience grab the players too.
Since I use Windows Live Writer as my blogging tool, I wanted to share my workflow for embedding videos into blog posts (or other content that I can author using Live Writer). First, grab the necessary tools:
- Dynamic Template add-in for Writer
- Silverlight Media Framework v2 Progressive Download template (and/or Smooth Streaming player)
Install the Dynamic Template add-in for Writer. Next step is to put your ProgressiveDownloadPlayer.xap somewhere. This doesn’t matter, as along as you know the URL to it. I keep mine on my cloud storage share since I can re-use it in various places. Once all those pieces are in place here is what I do.
Step 1 – Create the Dynamic Template
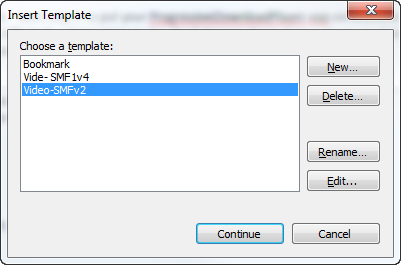
In order to create a template, you have to execute the Insert function for Dynamic Template to bring up the dialog. Once there, choose to Edit Templates and give it a name.

Then in the template code, copy this HTML:
1: <object data="data:application/x-silverlight-2," type="application/x-silverlight-2" width="640" height="480">
2: <param name="source" value="URL_TO_YOUR_PLAYER_XAP" />
3: <param name="background" value="white" />
4: <param name="enableHtmlAccess" value="true" />
5: <param name="minRuntimeVersion" value="4.0.50424.0" />
6: <param name="initParams" value="MediaUrl=<%= VideoUrl %>,AutoPlay=false,ThumbnailUrl=<%= ThumbnailUrl %>" />
7: <param name="autoUpgrade" value="true" />
8: <a href="http://go.microsoft.com/fwlink/?LinkID=149156&v=4.0.50424.0" style="text-decoration:none">
9: <img src="http://go.microsoft.com/fwlink/?LinkId=161376" alt="Get Microsoft Silverlight" style="border-style:none" />
10: </a>
11: </object>
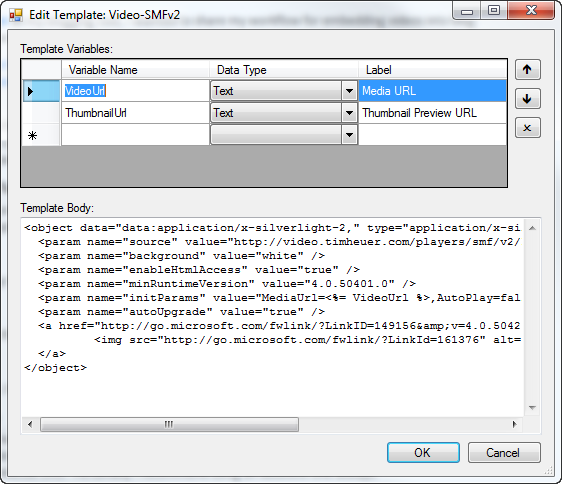
And in the settings use these in this screenshot:

Of course, replace with the URL to your player location. That’s it, that is your template.
Step 2 – Prepare your media
I’m assuming that you already have media to display, but if you don’t, use your favorite media encoding tool to create the media and have the URL. Note that it doesn’t have to be an absolute URL, but just understand the paths of your web app if you plan on using a relative URL. Personally I recommend using an absolute one always.
Also the snippet above, while not required, implements the ThumbnailUrl (thanks Kevin) parameter for the player. You’ll need a URL to a thumbnail image for preview.
Step 3 – Execute the template
Now that you have the template, you can use it. Rather than talk about it, here’s an embedded video (using the process) demonstrating the process :-)…
Simple, huh? Now of course you cannot see the final result in Writer (not sure why actually but I think it has something to do with the rendering techniques they use in authoring mode (hence the white box in the vid), but you can see the end result!
Summary
Silverlight Media Framework is awesome. Live Writer is awesome. Awesome+Aweomse = Awesomely Awesome. Kidding aside, if you have similar workflows to me, this should help you. It has streamlined the content publishing process when I need it in a simple, but efficient way.
Hope this helps!
Please enjoy some of these other recent posts...