Silverlight 3 “toast” notifications
- | Posted in
- silverlight
- xaml
- ria
- growl
- growl for windows
- notifications
- toast
I was messing around with a new internal application the other day and made a wise crack about some of the features out in the open. And by wise-crack, I mean ‘feedback in the nicest way possible’ of course. On one of my suggestions someone pointed out a RTFM moment that the feature was actually in there but had a dependency. The feature I was requesting was “toast” notifications.
What is “toast”? Aside from a delicious breakfast treat, it’s a term that most people refer to those little notification windows that popup from applications in the Windows system tray. Sometimes annoying, mostly useful (depending on how many notifications you get of course).
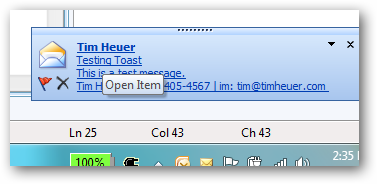
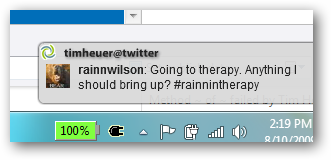
examples of “toast” notifications
If you are a Windows programmer, there are APIs you can directly tap into to trigger these things in the standard notification bubbles provided by Windows. If you are a web programmer though, it would be a challenge to bubble up a message to the native client from a web page with ease. You could if you wanted though, as Windows provides a standard method for any application to opt-in to using.
OSX users have the same feature (global notification system), but I’m assuming it isn’t easy to use, which is why Growl exists. It is an application itself that allows a developer to send a notification message to it. It is user configurable (meaning I, the user, define what my notifications look like and when), but serves as a platform for OSX app developers to leverage and provide the user with a consistent notification platform. Growl is not a part of OSX though and still requires to be there.
Back to my internal app feedback. This application made use of something I wasn’t aware of – Growl for Windows. It’s basically a Windows port of the Growl framework. Interesting I thought. I wondered why this application developer of our internal app didn’t just use the native Windows notification system, but I digress. I started looking around and saw that they have it enabled for web applications to use it. Cool! Of course the dependency is still required (i.e., it must be installed), but if it is there, you can use it! Now, there are others that emulate this type of thing like jQuery Growl for web applications. These frameworks, however, show notifications in your application and not in your operating system. So if your web app was minimized you wouldn’t see the notification.
I got curious and saw they had a Javascript library to use…hmmm…Silverlight notifications. So I busted out a quick sample application for Silverlight that provides notifications through the Growl framework. Here’s a quick video of my efforts with me explaining a bit:
So what you have is multiple parts. First, it will only work if Growl for Windows is installed, so if you want to play around, install it. Second there is the Growl.js library of the framework. This would be in your web application hosting your Silverlight app. That’s really all you need. Now you can expose some Javascript functions to call the library. I created a generic one called NotifyGrowl which takes a title and content. This is very generic and uses a single notification type. Growl let’s you configure notification types to segment your messages a bit and allow your user to customize them like a different UI for error types versus warning types.
It’s pretty cool and interesting to play around with. Now for the things I don’t like…
Flash – It feels just a little dumb to be using a Flash component in a Silverlight application. In fact that’s what is happening here. The JavaScript API for the framework, really is a JavaScript API to a Flash application. When you initialize the Growl API in JavaScript, you are creating a SWF dynamically that you are then communicating to in later calls. It works, and works well, but it just feels wonky.
HTML Bridging – Hence the name of JavaScript implies that you’re using some HTML bridge activity to call from Silverlight into the API. While this is incredibly easy (you can learn how to do this here: <>), it will only work in-browser at the moment. I think the real power of notifications could be in the out-of-browser applications. Unfortunately, the HTML bridge isn’t available in OOB right now.
Dependency – This is obvious. While it is cool, it relies on Growl for Windows being installed. Are you going to ask your users to install two things?
Not common Growl – The API I played around with wouldn’t trigger Growl on OSX. That kinda sucks. I thought it would which is why I started messing around. I figured you’d be able to write to an API that both platforms subscribe to, but it isn’t the case.
The Growl for Windows project does have a .NET library, so why would I use the JavaScript/Flash one? Well, the Growl system relies on socket communication so in theory, Silverlight should be able to use it. Right now, however, Silverlight has restricted port ranges for socket communication. Those port ranges don’t fall in line with the current accepted range for Growl messages. In theory (and I’ve asked the developer about this) you should be able to forward messages back/forth. An experiment for another time perhaps. Right now the developers of Growl for Windows operate using the Growl Notification Transport Protocol (GNTP) but the Mac/OSX version of Growl does not yet. Apparently the Mac/OSX developers have pledged to work on this.
It was a fun experiment to play around with and see how a Silverlight/browser application could provide OS-wide notifications if a framework existed.
What do you think…would you like a “toast” navigation API in the Silverlight runtime for you to use? What features would you expect that feature to have?


