Use Bing Maps in your Windows 8 XAML applications
Today the Bing team announced the release of their WinRT Bing Maps control (BETA) for XAML applications. First the goods:
- Read their announcement here: Bing Maps for Metro style apps
- Download the bits: Bing Maps SDK for Metro style apps (VSIX)
- Read the reference API docs: Bing Maps SDK
If you are familiar with the Silverlight control, it is similar in nature to how you would use it in your XAML Metro style app. Here’s some helpful tips that are in the docs but just wanted to elevate them because we have a tendency not to read docs :-).
Installing
Installing is simple for Visual Studio. Download the VSIX file and double-click it. If you have both Express and Ultimate installed it will prompt you to install it for both installations. That’s it…you are done. If you had VS running while you did this, it would be a good idea to restart VS.
Creating a .NET XAML application with maps
Once you restart VS, you can create a new C# Metro style application. Once you have this, just right click on the project and choose Add Reference and then navigate to the Windows\Extensions section and you will see Bing Maps:

When you do this you will also want to add a reference to the VCLibs Extension at this time. Why? Well, the Map control is a native control. Adding the VCLibs dependency at this time will add the necessary information in your app’s package manifest noting the dependency and it will install any required package dependencies from the store when your user’s install it.
If you compile your application immediately you will notice an exception during build:
1: 1>------ Build started: Project: Application17, Configuration: Debug Any CPU ------ 2: 1>C:\Windows\Microsoft.NET\Framework\v4.0.30319\Microsoft.Common.targets(1667,5): error MSB3774: Could not find SDK "Microsoft.VCLibs, Version=11.0".
3: 1>C:\Windows\Microsoft.NET\Framework\v4.0.30319\Microsoft.Common.targets(1667,5): error MSB3778: "APPX" attributes were found in the SDK manifest file however none of the attributes matched the targeted configuration and architecture and no "APPX" attribute without configuration and architecture could be found. If an appx is required then the project will fail at runtime.
4: ========== Build: 0 succeeded, 1 failed, 0 up-to-date, 0 skipped ========== This is because by default the managed applications are “AnyCPU” configuration and the native control doesn’t have that configuration. Change your app to be either x86 or amd64 and your build will succeed. This means that yes, you will want to create multiple architecture-specific packages for your app. The good thing is during package creation, the tools in Visual Studio make this easy for you.
Creating a C++ XAML application with maps
For C++ the step is to just reference the Bing Maps extension SDK and you are done. C++ projects are always architecture-specific so you don’t have the AnyCPU situation here.
Using the Map control
You’ll need to get set up with an API key, which the getting started docs inform you about. Once you have that you are ready to use the control. I’m a fan of putting the API key in my App.xaml as a resource:
1: <Application.Resources>
2: <ResourceDictionary>
3: <ResourceDictionary.MergedDictionaries>
4: <ResourceDictionary Source="Common/StandardStyles.xaml"/>
5: </ResourceDictionary.MergedDictionaries>
6: <x:String x:Key="BingMapsApiKey">YOUR KEY HERE</x:String>
7: </ResourceDictionary>
8: </Application.Resources>
And then in my Map control I can just refer to it:
1: <Page
2: x:Class="Application17.BlankPage"
3: xmlns="http://schemas.microsoft.com/winfx/2006/xaml/presentation"
4: xmlns:x="http://schemas.microsoft.com/winfx/2006/xaml"
5: xmlns:local="using:Application17"
6: xmlns:d="http://schemas.microsoft.com/expression/blend/2008"
7: xmlns:mc="http://schemas.openxmlformats.org/markup-compatibility/2006"
8: xmlns:bing="using:Bing.Maps"
9: mc:Ignorable="d">
10: 11: <Grid Background="{StaticResource ApplicationPageBackgroundBrush}">
12: <bing:Map x:Name="MyMap" Width="640" Height="480"
13: Credentials="{StaticResource BingMapsApiKey}" />
14: </Grid>
15: </Page>
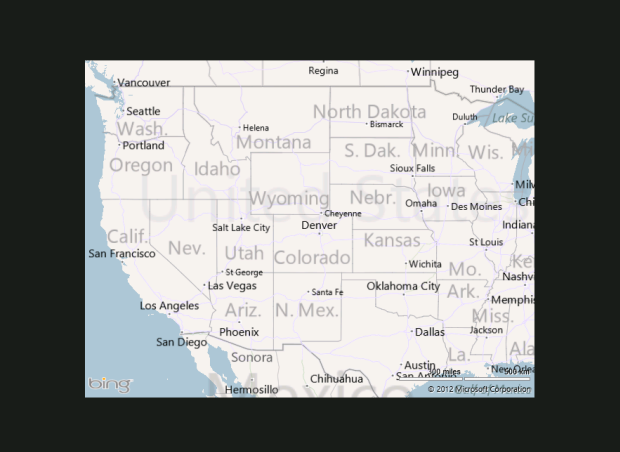
Once I have those pieces in place, I’m done and can run my app and get full map interactivity. Notice the xmlns declaration in my Page with the “using:Bing.Maps” notation. Now when I run:

I can quickly add location to my app by setting the capability in the Package.appxmanifest and then wiring up the map to center on my current location…
1: async protected override void OnNavigatedTo(NavigationEventArgs e)
2: { 3: Geolocator geo = new Geolocator();
4: geo.DesiredAccuracy = PositionAccuracy.Default; 5: var currentPosition = await geo.GetGeopositionAsync(); 6: 7: Location loc = new Location() { Latitude = currentPosition.Coordinate.Latitude,
8: Longitude = currentPosition.Coordinate.Longitude }; 9: 10: MyMap.SetView( 11: loc, // location
12: 13, // zoom level
13: true); //show animations)
14: 15: } I’m excited about what the Bing team has done here and you should go grab it, read the docs and start incorporating location visualization into your Metro style XAML apps today!
Hope this helps!
Please enjoy some of these other recent posts...