Adding approval workflow to your GitHub Action
| CommentsOne of the biggest things that I’ve wanted (and have heard others) when adopting GitHub Actions is the use of some type of approval flow. Until now (roughly the time of this writing) that wasn’t possible easily in Actions. The concept of how Azure Pipelines does it is so nice and simple to understand in my opinion and a lot of the attempts by others using various Actions stitched together made it tough to adopt. Well, announced at GitHub Universe, reviewers is now in Beta for Actions customers!!! Yes!!! I spent some time setting up a flow with an ASP.NET 5 web app and Azure as my deployment to check it out. I wanted to share my write-up in hopes it might help others get started quickly as well. First I’ll acknowledge that this is the simplest getting started you can have and your workflows may be more complex, etc. If you’d like to have a primer and see some other updates on Actions, be sure to check out Chris Patterson’s session from Universe: Continuous delivery with GitHub Actions. With that let’s get started!
Setting things up
First we’ll need a few things to get started. These are things I’m not going to walk through here but will explain briefly what/why it is needed for my example.
- An Azure account – I’m using this sample with Azure as my deployment because that’s where I do most of my work. You can get a free Azure account as well and do exactly this without any obligation.
- Set up an Azure App Service resource – I’m using App Service Linux and just created it using basically all the defaults. This is just a sample so those are fine for me. I also created these using the portal to have everything setup in advance.
- I added one Application Setting to my App Service called APPSERVICE_ENVIRONMENT so I could just extract a string noting which environment I was in and display it on the home page.
- In your App Service create a Deployment Slot and name it “staging” and choose to clone the main service settings (to get the previous app setting I noted). I then changed the app setting value for this deployment slot.
- Download the publish profile for each your production and staging instances individually and save those somewhere for now as we’ll refer back to them in the next step.
- I created an ASP.NET 5 Web App using the default template from Visual Studio 2019. I made some code changes in the Index.cshtml to pull from app settings, but otherwise it is unchanged.
- I used the new Git features in Visual Studio to quickly get my app to a repository in my GitHub account and enabled Actions on that repo.
That’s it! With those basics set up I can get started with the next steps of building out the workflow. I should note that the steps I’m outlining here are free for GitHub public repositories. For private repositories you need to be a GitHub Enterprise Server customer. Since my sample is public I’m ready to go!
Environments
The first concept is Environments. These are basically a separate segmented definition of your repo that you can associate secrets and protection rules with. This is the key to the approval workflow as one of the protection rules is reviewers required (aka approvers). The first thing we’ll do is set up two environments: staging and production. Go to your repository settings and you’ll see a new section called Environments in the navigation.
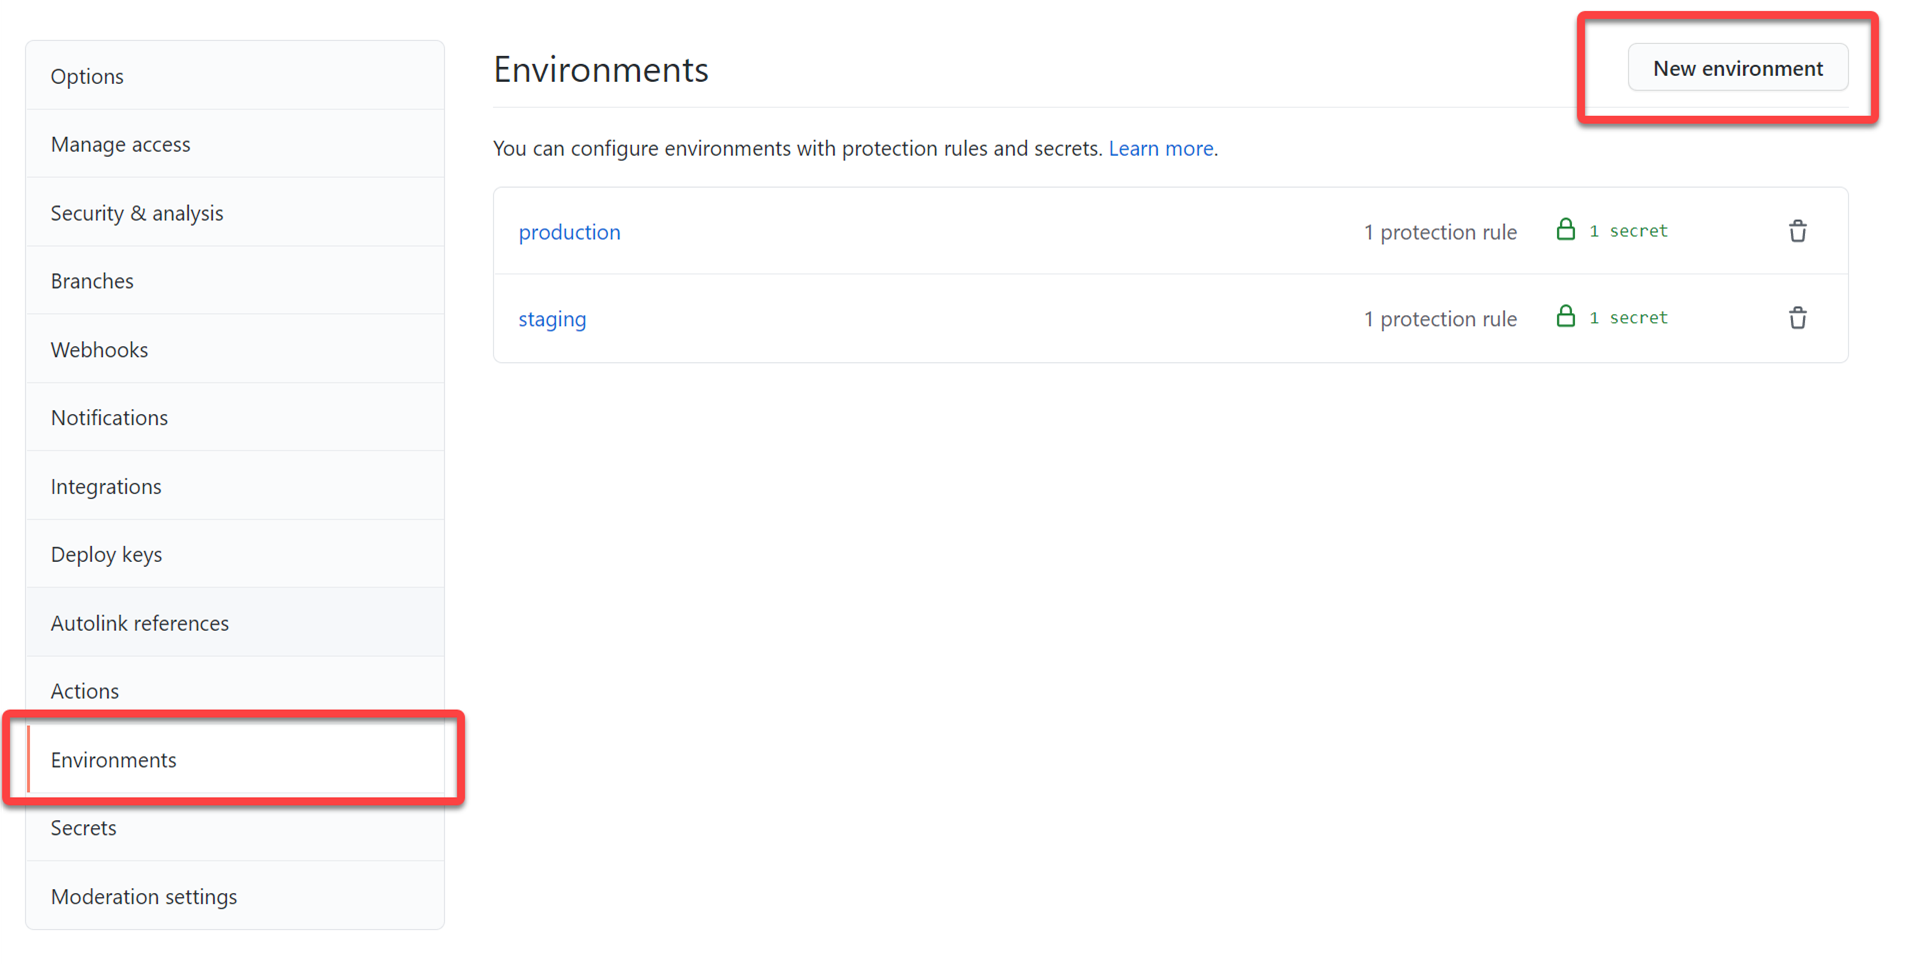
To create an environment, click the New Environment button and give it a name. I created one called production and one called staging. In each of these you can do things independently like secrets and reviewers. Because I’m a team of one person my reviewer will be me, but you could set up others like maybe a build engineer for staging approval deployment and a QA team for production deployment. Either way click the Required reviewers checkbox and add yourself at least and save protection rule.
NOTE: This area may expand more to further protection rules but for now it is reviewers or a wait delay. GitHub indicates others may be in the future.
Now we’ll add some secrets. With Environments, you can have independent secrets for each environment. Maybe you want to have different deployment variables, etc. for each environment, this is where you could do it. For us, this is specifically what we’ll use the different publish profiles for. Remember those profiles you downloaded earlier, now you’ll need them. In the staging environment create a new secret named AZURE_PUBLISH_PROFILE and paste in the contents of your staging publish profile. Then go to your production environment settings and do the same using the same secret name and use the production publish profile you downloaded earlier. This allows our workflow to use environment-specific secret settings when they are called, but still use the same secret name…meaning we don’t need AZURE_PUBLISH_PROFILE_STAGING naming as we’ll be marking the environment in the workflow and it will pick up secrets from that environment only (or the repo if not found there – you can have a hierarchy of secrets effectively).
Okay we’re done setting up the Environment in the repo…off to set up the workflow!
Setting up the workflow
To get me quickly started I used my own template so I could `dotnet new workflow` in my repo root using the CLI. This gives me a strawman to work with. Let’s build out the basics, we’re going to have 3 jobs: build, deploy to staging, deploy to prod. Let’s get started. The full workflow is in my repo for this post, but I’ll be extracting snippets to focus on and show relevant pieces here.
Build
For build I’m using my standard implementation of restore/build/publish/upload artifacts which looks like this (with some environment-specific keys):
jobs:
  build:
    name: Build
    if: github.event_name == 'push' && contains(toJson(github.event.commits), '***NO_CI***') == false && contains(toJson(github.event.commits), '[ci skip]') == false && contains(toJson(github.event.commits), '[skip ci]') == false
    runs-on: ubuntu-latest
    steps:
    - uses: actions/checkout@v2
    - name: Setup .NET Core SDK ${{ env.DOTNET_CORE_VERSION }}
      uses: actions/setup-dotnet@v1
      with:
        dotnet-version: ${{ env.DOTNET_CORE_VERSION }}
    - name: Restore packages
      run: dotnet restore "${{ env.PROJECT_PATH }}"
    - name: Build app
      run: dotnet build "${{ env.PROJECT_PATH }}" --configuration ${{ env.CONFIGURATION }} --no-restore
    - name: Test app
      run: dotnet test "${{ env.PROJECT_PATH }}" --no-build
    - name: Publish app for deploy
      run: dotnet publish "${{ env.PROJECT_PATH }}" --configuration ${{ env.CONFIGURATION }} --no-build --output "${{ env.AZURE_WEBAPP_PACKAGE_PATH }}"
    - name: Publish Artifacts
      uses: actions/[email protected]
      with:
        name: webapp
        path: ${{ env.AZURE_WEBAPP_PACKAGE_PATH }}
Notice this job is ‘build’ and ends with uploading some artifacts to the job. That’s it, the core functionality is to build/test this and store the final artifacts.
Deploy to staging
Next job we want is to deploy those bits to staging environment, which will be our staging slot in our Azure App Service we set up before. Here’s the workflow job definition snippet:
  staging:
    needs: build
    name: Deploy to staging
    environment:
        name: staging
        url: ${{ steps.deploy_staging.outputs.webapp-url }}
    runs-on: ubuntu-latest
    steps:
    # Download artifacts
    - name: Download artifacts
      uses: actions/download-artifact@v2
      with:
        name: webapp

    # Deploy to App Service Linux
    - name: Deploy to Azure WebApp
      uses: azure/webapps-deploy@v2
      id: deploy_staging
      with:
        app-name: ${{ env.AZURE_WEBAPP_NAME }}
        publish-profile: ${{ secrets.AZURE_PUBLISH_PROFILE }}
        slot-name: staging
In this job we download the previously published artifacts to be used as our app to deploy. Observe a few other things here:
- I’ve declared that this job ‘needs’ the ‘build’ job to start. This ensures a sequence workflow. If build job fails, this doesn’t start.
- I’ve declared this job an ‘environment’ and marked it using staging which maps to the Environment name we set up on the repo settings.
- In the publish phase I specified the slot-name value mapping to the Azure App Service slot name we created on our resource in the portal.
- Specify getting the AZURE_PUBLISH_PROFILE secret from the repo
You’ll also notice the ‘url’ setting on the environment. This is a cool little delighter that you should use. One of the outputs of the Azure web app deploy action is the URL to where it was deployed. I can extract that from the step and put it in this variable. GitHub Actions summary will now show this final URL in the visual map of the workflow. It is a small delighter, but you’ll see useful a bit later. Notice I don’t put any approver information in here. By declaring this in the ‘staging’ environment it will follow the protection rules we previously set up. So in fact, this job won’t run unless (1) build completes successfully and (2) the protection rules for the environment are stratified.
Deploy to production
Similarly to staging we have a final step to deploy to production. Here’s the definition snippet:
  deploy:
    needs: staging
    environment:
      name: production
      url: ${{ steps.deploy_production.outputs.webapp-url }}
    name: Deploy to production
    runs-on: ubuntu-latest
    steps:
    # Download artifacts
    - name: Download artifacts
      uses: actions/download-artifact@v2
      with:
        name: webapp

    # Deploy to App Service Linux
    - name: Deploy to Azure WebApp
      id: deploy_production
      uses: azure/webapps-deploy@v2
      with:
        app-name: ${{ env.AZURE_WEBAPP_NAME }}
        publish-profile: ${{ secrets.AZURE_PUBLISH_PROFILE }}
This is almost identical to staging except we changed:
- Needs ‘staging’ to complete before this runs
- Changed the environment to production to follow those protection rules
- Removed the slot-name for deployment (default is production)
- Changed the URL output value to the value from this job
Notice that we have the same AZURE_PUBLISH_PROFILE secret used here. Because we are declaring environments we will get the environment-specific secret in these job scopes. Helpful to have a common name and just map to different environments rather than many little ones – at least my opinion it does.
That’s it, we now have our full workflow to build –> deploy to staging with approval –> deploy to production with approval. Let’s see it in action!
Trigger the workflow
Once we have this workflow in fact we can commit/push this workflow file and it should trigger a run itself. Otherwise you can do a different code change/commit/push to trigger as well. We get a few things here when the run happens.
First we get a nicer visualization of the summary of the job:
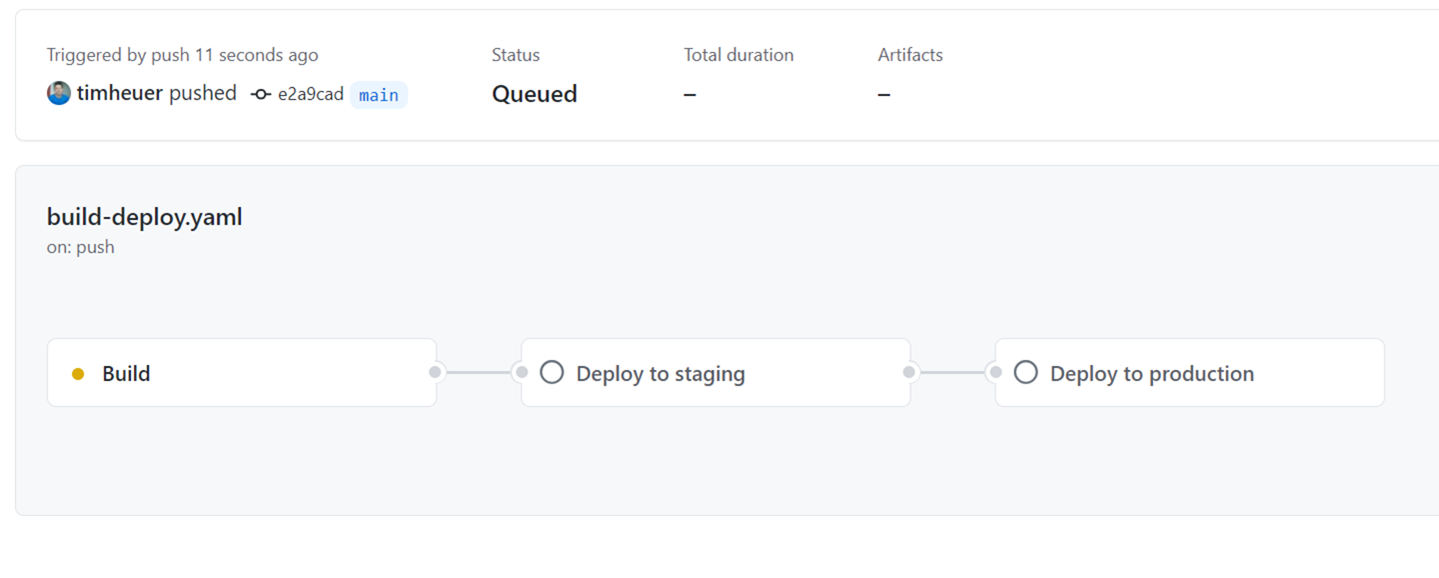
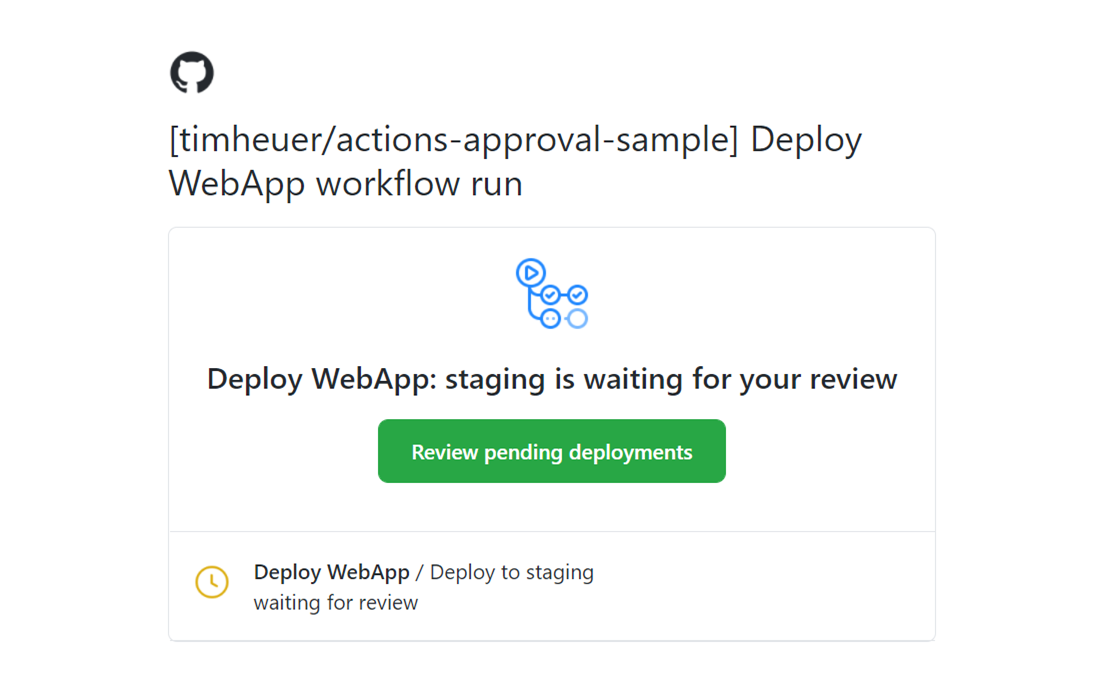
When the protection rules are hit, a few things happen. Namely the run stops and waits, but the reviewers are notified. The notification happens in standard GitHub notification means. I have email notifications and so I got an email like this:
I can then click through and approve the workflow step and add comments:
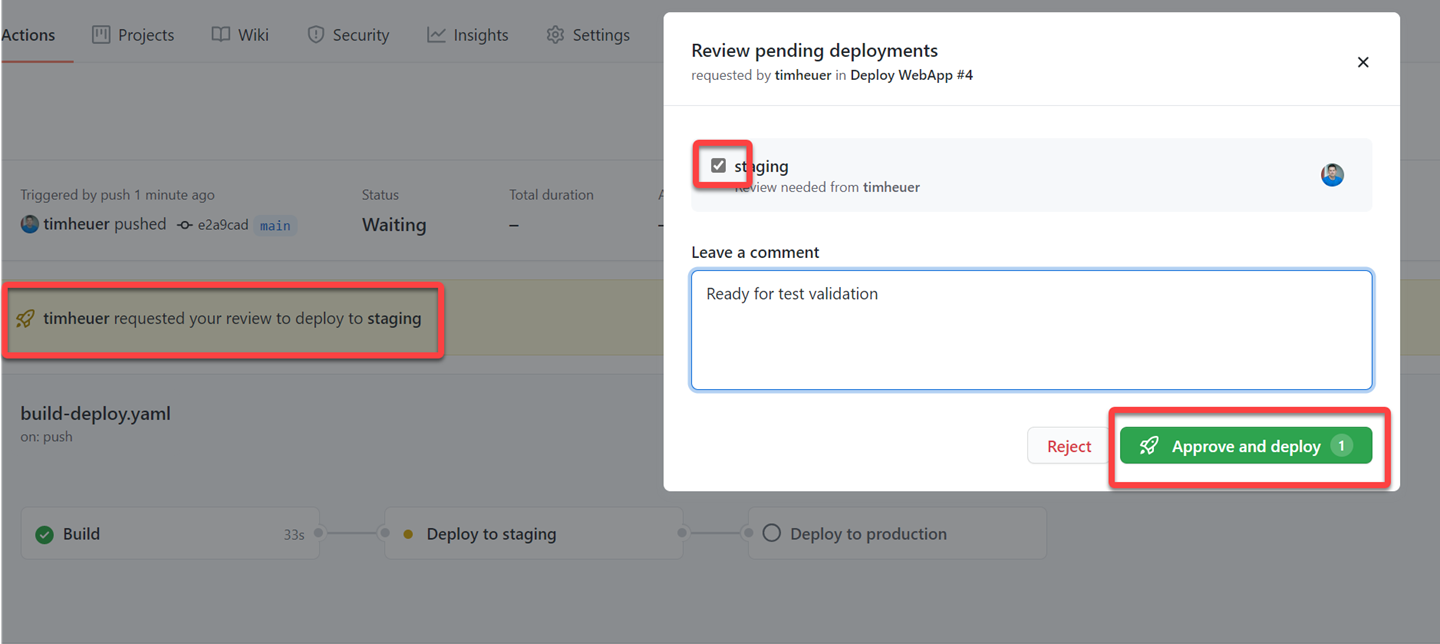
Once that step is approved, the job runs. On the environment job it provides a nice little progress indicator of the steps:
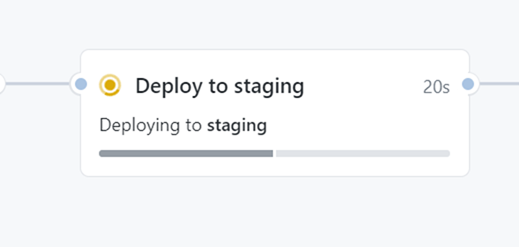
Remember that URL setting we had? Once that job finished, you’ll see it surface in that nice summary view to quickly click through and test your staging environment:

Once we are satisfied with the staging environment we can then approve the next workflow and the same steps happen and we are deployed to production!
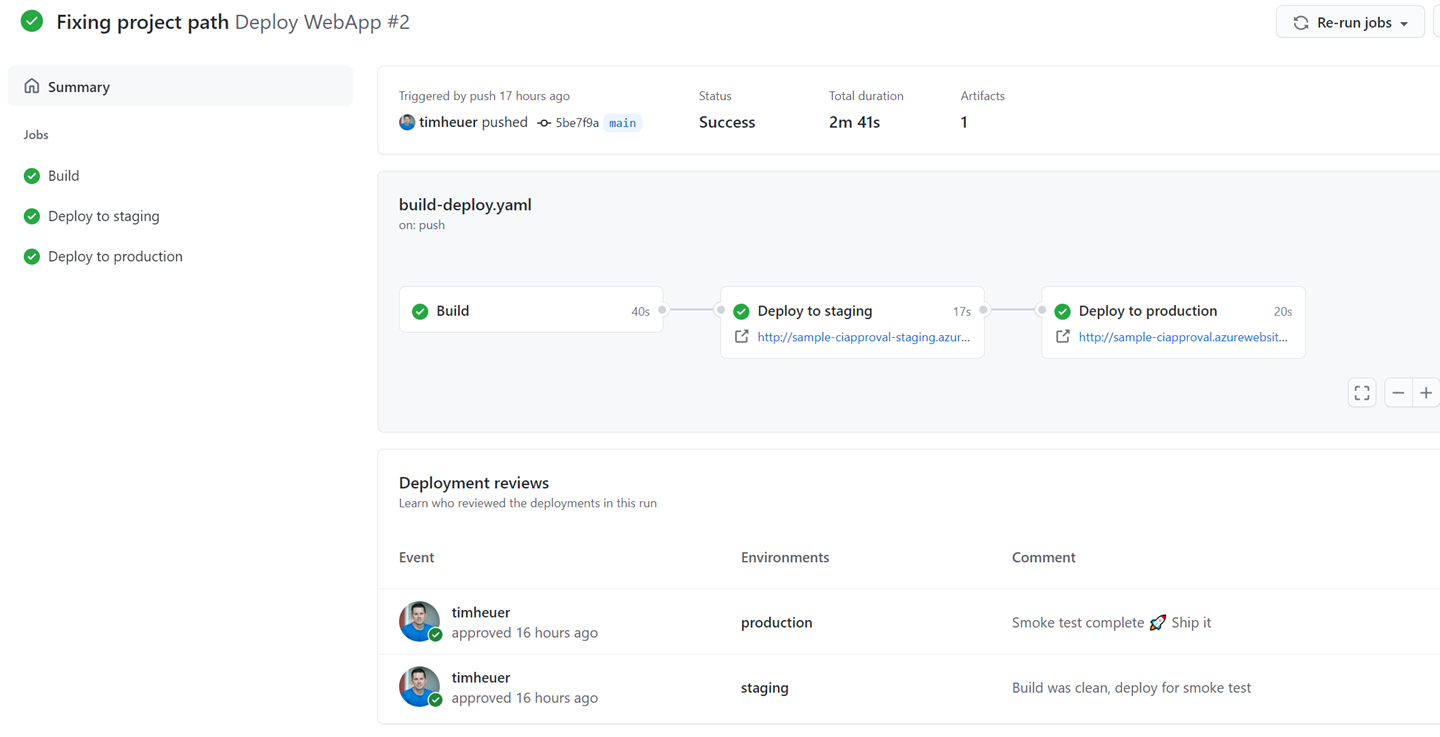
And we’re done!
Summary
The concept of approvals in Actions workflows has been a top request I’ve heard and I’m glad it is finally there! I’m in the process of adding it as an extra protection to all my public repo projects, whether it be for a web app deployment or a NuGet package publish, it is a helpful protection to put in place in your Actions. It’s rather simple to set up and if you have a relatively simple workflow it is equally simple to config and modify already to incorporate. More complex workflows might require a bit more thought but still simple to augment. I’ve posted my full sample here and the workflow file in the repo timheuer/actions-approval-sample where you can see the full workflow file here. This was fun to walk through and I hope this write-up helps you get started as well!
Please enjoy some of these other recent posts...
Comments