At PDC09, Glenn Block delivered a great presentation on building extensible RIAs using the Managed Extensibility Framework (FT24 from the PDC09 sessions).  Glenn is one of the PMs and face-man for MEF.  He’s been traveling all around singing the praises of MEF for .NET developers and gathering feedback along the way.  You may remember Glenn from his work with the Prism framework as well.  I snagged Glenn at the end of PDC to grab a sound-byte:

Glenn has already started a series on MEF in Silverlight starting with the basics and then continuing along deeper.

These two initial posts are helpful to anyone who hasn’t started at all with MEF and understanding the value of implementing an extensible Silverlight application.  I know Glenn has more up his sleeves and I’ve been thinking on ideas with him as well (trying to learn MEF myself) so be sure to stay tuned for more excellent posts by Glenn on MEF and Silverlight!

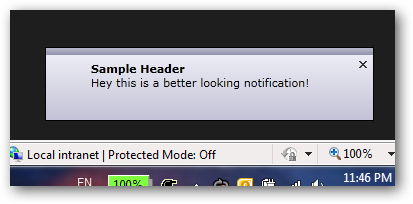
One of the cool features for Silverlight 4 Out-of-browser applications that was announced as a part of the Silverlight 4 beta release is the NotificationWindow class.  Most commonly referred to as “toast” these are the little notifications that popup in the system areas of your operating system to provide helpful (and sometimes annoying) information.  Any user of Microsoft Outlook no doubt has seen them.  They look something like this (Windows system tray area shown here):

Silverlight 4 NotificationWindow sample image

After reading Corey’s post showing a quick FAQ on customizing the experience of the NotificationWindow, I was drawn to the comment he made about queuing.  While the NotificationWindow API doesn’t have a queuing mechanism, .NET does and we can leverage that.

NOTE: For a simple overview with a short video and downloadable sample code in C# and Visual Basic about the Notification Window API visit this video: Notification API in Silverlight 4.

Let’s say you had some need to queue up notifications.  Or better yet, you really didn’t have a *need* to, but wanted to ensure that any notification you wanted to display would regardless of if a notification was currently showing, etc. – you want to make sure your notification hits.

Instead of just firing .Show() on your NotificationWindow, thing of using the Queue<T> class.  This enables a collection of items stored in sequential order and serves this purpose well.  Let’s assume a simple demonstration here.

We have an extremely simple UI with four buttons…each going to trigger a different NotificationWindow.  Here’s our XAML:

   1: <StackPanel x:Name="ApplicationSample" Visibility="Collapsed">
<pre style="border-bottom-style: none; text-align: left; padding-bottom: 0px; line-height: 12pt; border-right-style: none; background-color: #f4f4f4; margin: 0em; padding-left: 0px; width: 100%; padding-right: 0px; font-family: 'Courier New', courier, monospace; direction: ltr; border-top-style: none; color: black; font-size: 8pt; border-left-style: none; overflow: visible; padding-top: 0px"><span style="color: #606060" id="lnum2">   2:</span>     <span style="color: #0000ff">&lt;</span><span style="color: #800000">Button</span> <span style="color: #ff0000">Content</span><span style="color: #0000ff">="Notification One"</span> <span style="color: #ff0000">x:Name</span><span style="color: #0000ff">="Notify1"</span> <span style="color: #ff0000">Click</span><span style="color: #0000ff">="Notify1_Click"</span> <span style="color: #0000ff">/&gt;</span></pre>
<pre style="border-bottom-style: none; text-align: left; padding-bottom: 0px; line-height: 12pt; border-right-style: none; background-color: #f4f4f4; margin: 0em; padding-left: 0px; width: 100%; padding-right: 0px; font-family: 'Courier New', courier, monospace; direction: ltr; border-top-style: none; color: black; font-size: 8pt; border-left-style: none; overflow: visible; padding-top: 0px"><span style="color: #606060" id="lnum3">   3:</span>     <span style="color: #0000ff">&lt;</span><span style="color: #800000">Button</span> <span style="color: #ff0000">Content</span><span style="color: #0000ff">="Notification Two"</span> <span style="color: #ff0000">x:Name</span><span style="color: #0000ff">="Notify2"</span> <span style="color: #ff0000">Click</span><span style="color: #0000ff">="Notify2_Click"</span> <span style="color: #0000ff">/&gt;</span></pre>
<pre style="border-bottom-style: none; text-align: left; padding-bottom: 0px; line-height: 12pt; border-right-style: none; background-color: #f4f4f4; margin: 0em; padding-left: 0px; width: 100%; padding-right: 0px; font-family: 'Courier New', courier, monospace; direction: ltr; border-top-style: none; color: black; font-size: 8pt; border-left-style: none; overflow: visible; padding-top: 0px"><span style="color: #606060" id="lnum4">   4:</span>     <span style="color: #0000ff">&lt;</span><span style="color: #800000">Button</span> <span style="color: #ff0000">Content</span><span style="color: #0000ff">="Notification Three"</span> <span style="color: #ff0000">x:Name</span><span style="color: #0000ff">="Notify3"</span> <span style="color: #ff0000">Click</span><span style="color: #0000ff">="Notify3_Click"</span> <span style="color: #0000ff">/&gt;</span></pre>
<pre style="border-bottom-style: none; text-align: left; padding-bottom: 0px; line-height: 12pt; border-right-style: none; background-color: #f4f4f4; margin: 0em; padding-left: 0px; width: 100%; padding-right: 0px; font-family: 'Courier New', courier, monospace; direction: ltr; border-top-style: none; color: black; font-size: 8pt; border-left-style: none; overflow: visible; padding-top: 0px"><span style="color: #606060" id="lnum5">   5:</span>     <span style="color: #0000ff">&lt;</span><span style="color: #800000">Button</span> <span style="color: #ff0000">Content</span><span style="color: #0000ff">="Notification Four"</span> <span style="color: #ff0000">x:Name</span><span style="color: #0000ff">="Notify4"</span> <span style="color: #ff0000">Click</span><span style="color: #0000ff">="Notify4_Click"</span> <span style="color: #0000ff">/&gt;</span></pre>
<pre style="border-bottom-style: none; text-align: left; padding-bottom: 0px; line-height: 12pt; border-right-style: none; background-color: #f4f4f4; margin: 0em; padding-left: 0px; width: 100%; padding-right: 0px; font-family: 'Courier New', courier, monospace; direction: ltr; border-top-style: none; color: black; font-size: 8pt; border-left-style: none; overflow: visible; padding-top: 0px"><span style="color: #606060" id="lnum6">   6:</span> <span style="color: #0000ff">&lt;/</span><span style="color: #800000">StackPanel</span><span style="color: #0000ff">&gt;</span></pre>

The button click logic looks the same for each (with the exception of passing in a different string of text to display):

   1: private void Notify1_Click(object sender, RoutedEventArgs e)
<pre style="border-bottom-style: none; text-align: left; padding-bottom: 0px; line-height: 12pt; border-right-style: none; background-color: #f4f4f4; margin: 0em; padding-left: 0px; width: 100%; padding-right: 0px; font-family: 'Courier New', courier, monospace; direction: ltr; border-top-style: none; color: black; font-size: 8pt; border-left-style: none; overflow: visible; padding-top: 0px"><span style="color: #606060" id="lnum2">   2:</span> {</pre>
<pre style="border-bottom-style: none; text-align: left; padding-bottom: 0px; line-height: 12pt; border-right-style: none; background-color: #f4f4f4; margin: 0em; padding-left: 0px; width: 100%; padding-right: 0px; font-family: 'Courier New', courier, monospace; direction: ltr; border-top-style: none; color: black; font-size: 8pt; border-left-style: none; overflow: visible; padding-top: 0px"><span style="color: #606060" id="lnum3">   3:</span>     CreateNewNotificationControl(<span style="color: #006080">"Notification One"</span>);</pre>
<pre style="border-bottom-style: none; text-align: left; padding-bottom: 0px; line-height: 12pt; border-right-style: none; background-color: #f4f4f4; margin: 0em; padding-left: 0px; width: 100%; padding-right: 0px; font-family: 'Courier New', courier, monospace; direction: ltr; border-top-style: none; color: black; font-size: 8pt; border-left-style: none; overflow: visible; padding-top: 0px"><span style="color: #606060" id="lnum4">   4:</span> }</pre>
<pre style="border-bottom-style: none; text-align: left; padding-bottom: 0px; line-height: 12pt; border-right-style: none; background-color: #f4f4f4; margin: 0em; padding-left: 0px; width: 100%; padding-right: 0px; font-family: 'Courier New', courier, monospace; direction: ltr; border-top-style: none; color: black; font-size: 8pt; border-left-style: none; overflow: visible; padding-top: 0px"><span style="color: #606060" id="lnum5">   5:</span>  </pre>
<pre style="border-bottom-style: none; text-align: left; padding-bottom: 0px; line-height: 12pt; border-right-style: none; background-color: #f4f4f4; margin: 0em; padding-left: 0px; width: 100%; padding-right: 0px; font-family: 'Courier New', courier, monospace; direction: ltr; border-top-style: none; color: black; font-size: 8pt; border-left-style: none; overflow: visible; padding-top: 0px"><span style="color: #606060" id="lnum6">   6:</span> <span style="color: #0000ff">private</span> <span style="color: #0000ff">void</span> CreateNewNotificationControl(<span style="color: #0000ff">string</span> NotificationText)</pre>
<pre style="border-bottom-style: none; text-align: left; padding-bottom: 0px; line-height: 12pt; border-right-style: none; background-color: #f4f4f4; margin: 0em; padding-left: 0px; width: 100%; padding-right: 0px; font-family: 'Courier New', courier, monospace; direction: ltr; border-top-style: none; color: black; font-size: 8pt; border-left-style: none; overflow: visible; padding-top: 0px"><span style="color: #606060" id="lnum7">   7:</span> {</pre>
<pre style="border-bottom-style: none; text-align: left; padding-bottom: 0px; line-height: 12pt; border-right-style: none; background-color: #f4f4f4; margin: 0em; padding-left: 0px; width: 100%; padding-right: 0px; font-family: 'Courier New', courier, monospace; direction: ltr; border-top-style: none; color: black; font-size: 8pt; border-left-style: none; overflow: visible; padding-top: 0px"><span style="color: #606060" id="lnum8">   8:</span>     NotificationWindow nw = <span style="color: #0000ff">new</span> NotificationWindow();</pre>
<pre style="border-bottom-style: none; text-align: left; padding-bottom: 0px; line-height: 12pt; border-right-style: none; background-color: #f4f4f4; margin: 0em; padding-left: 0px; width: 100%; padding-right: 0px; font-family: 'Courier New', courier, monospace; direction: ltr; border-top-style: none; color: black; font-size: 8pt; border-left-style: none; overflow: visible; padding-top: 0px"><span style="color: #606060" id="lnum9">   9:</span>     nw.Width = 400;</pre>
<pre style="border-bottom-style: none; text-align: left; padding-bottom: 0px; line-height: 12pt; border-right-style: none; background-color: #f4f4f4; margin: 0em; padding-left: 0px; width: 100%; padding-right: 0px; font-family: 'Courier New', courier, monospace; direction: ltr; border-top-style: none; color: black; font-size: 8pt; border-left-style: none; overflow: visible; padding-top: 0px"><span style="color: #606060" id="lnum10">  10:</span>     nw.Height = 100;</pre>
<pre style="border-bottom-style: none; text-align: left; padding-bottom: 0px; line-height: 12pt; border-right-style: none; background-color: #f4f4f4; margin: 0em; padding-left: 0px; width: 100%; padding-right: 0px; font-family: 'Courier New', courier, monospace; direction: ltr; border-top-style: none; color: black; font-size: 8pt; border-left-style: none; overflow: visible; padding-top: 0px"><span style="color: #606060" id="lnum11">  11:</span>     nw.Closed += <span style="color: #0000ff">new</span> EventHandler&lt;EventArgs&gt;(OnNotificationClosed);</pre>
<pre style="border-bottom-style: none; text-align: left; padding-bottom: 0px; line-height: 12pt; border-right-style: none; background-color: #f4f4f4; margin: 0em; padding-left: 0px; width: 100%; padding-right: 0px; font-family: 'Courier New', courier, monospace; direction: ltr; border-top-style: none; color: black; font-size: 8pt; border-left-style: none; overflow: visible; padding-top: 0px"><span style="color: #606060" id="lnum12">  12:</span>  </pre>
<pre style="border-bottom-style: none; text-align: left; padding-bottom: 0px; line-height: 12pt; border-right-style: none; background-color: #f4f4f4; margin: 0em; padding-left: 0px; width: 100%; padding-right: 0px; font-family: 'Courier New', courier, monospace; direction: ltr; border-top-style: none; color: black; font-size: 8pt; border-left-style: none; overflow: visible; padding-top: 0px"><span style="color: #606060" id="lnum13">  13:</span>     NotificationControl nc = <span style="color: #0000ff">new</span> NotificationControl();</pre>
<pre style="border-bottom-style: none; text-align: left; padding-bottom: 0px; line-height: 12pt; border-right-style: none; background-color: #f4f4f4; margin: 0em; padding-left: 0px; width: 100%; padding-right: 0px; font-family: 'Courier New', courier, monospace; direction: ltr; border-top-style: none; color: black; font-size: 8pt; border-left-style: none; overflow: visible; padding-top: 0px"><span style="color: #606060" id="lnum14">  14:</span>     nc.NotificationText.Text = NotificationText;</pre>
<pre style="border-bottom-style: none; text-align: left; padding-bottom: 0px; line-height: 12pt; border-right-style: none; background-color: #f4f4f4; margin: 0em; padding-left: 0px; width: 100%; padding-right: 0px; font-family: 'Courier New', courier, monospace; direction: ltr; border-top-style: none; color: black; font-size: 8pt; border-left-style: none; overflow: visible; padding-top: 0px"><span style="color: #606060" id="lnum15">  15:</span>     nw.Content = nc;</pre>
<pre style="border-bottom-style: none; text-align: left; padding-bottom: 0px; line-height: 12pt; border-right-style: none; background-color: #f4f4f4; margin: 0em; padding-left: 0px; width: 100%; padding-right: 0px; font-family: 'Courier New', courier, monospace; direction: ltr; border-top-style: none; color: black; font-size: 8pt; border-left-style: none; overflow: visible; padding-top: 0px"><span style="color: #606060" id="lnum16">  16:</span>  </pre>
<pre style="border-bottom-style: none; text-align: left; padding-bottom: 0px; line-height: 12pt; border-right-style: none; background-color: #f4f4f4; margin: 0em; padding-left: 0px; width: 100%; padding-right: 0px; font-family: 'Courier New', courier, monospace; direction: ltr; border-top-style: none; color: black; font-size: 8pt; border-left-style: none; overflow: visible; padding-top: 0px"><span style="color: #606060" id="lnum17">  17:</span>     AddNotificationToQueue(nw);</pre>
<pre style="border-bottom-style: none; text-align: left; padding-bottom: 0px; line-height: 12pt; border-right-style: none; background-color: #f4f4f4; margin: 0em; padding-left: 0px; width: 100%; padding-right: 0px; font-family: 'Courier New', courier, monospace; direction: ltr; border-top-style: none; color: black; font-size: 8pt; border-left-style: none; overflow: visible; padding-top: 0px"><span style="color: #606060" id="lnum18">  18:</span> }</pre>
Notice the core function of CreateNewNotificationControl and the last line of AddNotificationToQueue.  This is the key function here.  Here is the code for the function:

   1: private void AddNotificationToQueue(NotificationWindow notification)
<pre style="border-bottom-style: none; text-align: left; padding-bottom: 0px; line-height: 12pt; border-right-style: none; background-color: #f4f4f4; margin: 0em; padding-left: 0px; width: 100%; padding-right: 0px; font-family: 'Courier New', courier, monospace; direction: ltr; border-top-style: none; color: black; font-size: 8pt; border-left-style: none; overflow: visible; padding-top: 0px"><span style="color: #606060" id="lnum2">   2:</span> {</pre>
<pre style="border-bottom-style: none; text-align: left; padding-bottom: 0px; line-height: 12pt; border-right-style: none; background-color: #f4f4f4; margin: 0em; padding-left: 0px; width: 100%; padding-right: 0px; font-family: 'Courier New', courier, monospace; direction: ltr; border-top-style: none; color: black; font-size: 8pt; border-left-style: none; overflow: visible; padding-top: 0px"><span style="color: #606060" id="lnum3">   3:</span>     <span style="color: #0000ff">if</span> (_currentWindow == <span style="color: #0000ff">null</span>)</pre>
<pre style="border-bottom-style: none; text-align: left; padding-bottom: 0px; line-height: 12pt; border-right-style: none; background-color: #f4f4f4; margin: 0em; padding-left: 0px; width: 100%; padding-right: 0px; font-family: 'Courier New', courier, monospace; direction: ltr; border-top-style: none; color: black; font-size: 8pt; border-left-style: none; overflow: visible; padding-top: 0px"><span style="color: #606060" id="lnum4">   4:</span>     {</pre>
<pre style="border-bottom-style: none; text-align: left; padding-bottom: 0px; line-height: 12pt; border-right-style: none; background-color: #f4f4f4; margin: 0em; padding-left: 0px; width: 100%; padding-right: 0px; font-family: 'Courier New', courier, monospace; direction: ltr; border-top-style: none; color: black; font-size: 8pt; border-left-style: none; overflow: visible; padding-top: 0px"><span style="color: #606060" id="lnum5">   5:</span>         _currentWindow = notification;</pre>
<pre style="border-bottom-style: none; text-align: left; padding-bottom: 0px; line-height: 12pt; border-right-style: none; background-color: #f4f4f4; margin: 0em; padding-left: 0px; width: 100%; padding-right: 0px; font-family: 'Courier New', courier, monospace; direction: ltr; border-top-style: none; color: black; font-size: 8pt; border-left-style: none; overflow: visible; padding-top: 0px"><span style="color: #606060" id="lnum6">   6:</span>         notification.Show(5000);</pre>
<pre style="border-bottom-style: none; text-align: left; padding-bottom: 0px; line-height: 12pt; border-right-style: none; background-color: #f4f4f4; margin: 0em; padding-left: 0px; width: 100%; padding-right: 0px; font-family: 'Courier New', courier, monospace; direction: ltr; border-top-style: none; color: black; font-size: 8pt; border-left-style: none; overflow: visible; padding-top: 0px"><span style="color: #606060" id="lnum7">   7:</span>     }</pre>
<pre style="border-bottom-style: none; text-align: left; padding-bottom: 0px; line-height: 12pt; border-right-style: none; background-color: #f4f4f4; margin: 0em; padding-left: 0px; width: 100%; padding-right: 0px; font-family: 'Courier New', courier, monospace; direction: ltr; border-top-style: none; color: black; font-size: 8pt; border-left-style: none; overflow: visible; padding-top: 0px"><span style="color: #606060" id="lnum8">   8:</span>     <span style="color: #0000ff">else</span></pre>
<pre style="border-bottom-style: none; text-align: left; padding-bottom: 0px; line-height: 12pt; border-right-style: none; background-color: #f4f4f4; margin: 0em; padding-left: 0px; width: 100%; padding-right: 0px; font-family: 'Courier New', courier, monospace; direction: ltr; border-top-style: none; color: black; font-size: 8pt; border-left-style: none; overflow: visible; padding-top: 0px"><span style="color: #606060" id="lnum9">   9:</span>     {</pre>
<pre style="border-bottom-style: none; text-align: left; padding-bottom: 0px; line-height: 12pt; border-right-style: none; background-color: #f4f4f4; margin: 0em; padding-left: 0px; width: 100%; padding-right: 0px; font-family: 'Courier New', courier, monospace; direction: ltr; border-top-style: none; color: black; font-size: 8pt; border-left-style: none; overflow: visible; padding-top: 0px"><span style="color: #606060" id="lnum10">  10:</span>         _notifyQueue.Enqueue(notification);</pre>
<pre style="border-bottom-style: none; text-align: left; padding-bottom: 0px; line-height: 12pt; border-right-style: none; background-color: #f4f4f4; margin: 0em; padding-left: 0px; width: 100%; padding-right: 0px; font-family: 'Courier New', courier, monospace; direction: ltr; border-top-style: none; color: black; font-size: 8pt; border-left-style: none; overflow: visible; padding-top: 0px"><span style="color: #606060" id="lnum11">  11:</span>     }</pre>
<pre style="border-bottom-style: none; text-align: left; padding-bottom: 0px; line-height: 12pt; border-right-style: none; background-color: #f4f4f4; margin: 0em; padding-left: 0px; width: 100%; padding-right: 0px; font-family: 'Courier New', courier, monospace; direction: ltr; border-top-style: none; color: black; font-size: 8pt; border-left-style: none; overflow: visible; padding-top: 0px"><span style="color: #606060" id="lnum12">  12:</span> }</pre>

In the code above _currentWindow is a NotificationWindow and _notifyQueue is a Queue<NotificationWindow> member variable.  We basically are adding the NotificationWindow objects we are creating to this collection and letting the Queue<T> help us manage what is showing when.  It is also key to note that when we do add a new NotificationWindow that we are attaching a Closed event handler that helps trigger the Dequeue function for our collection.

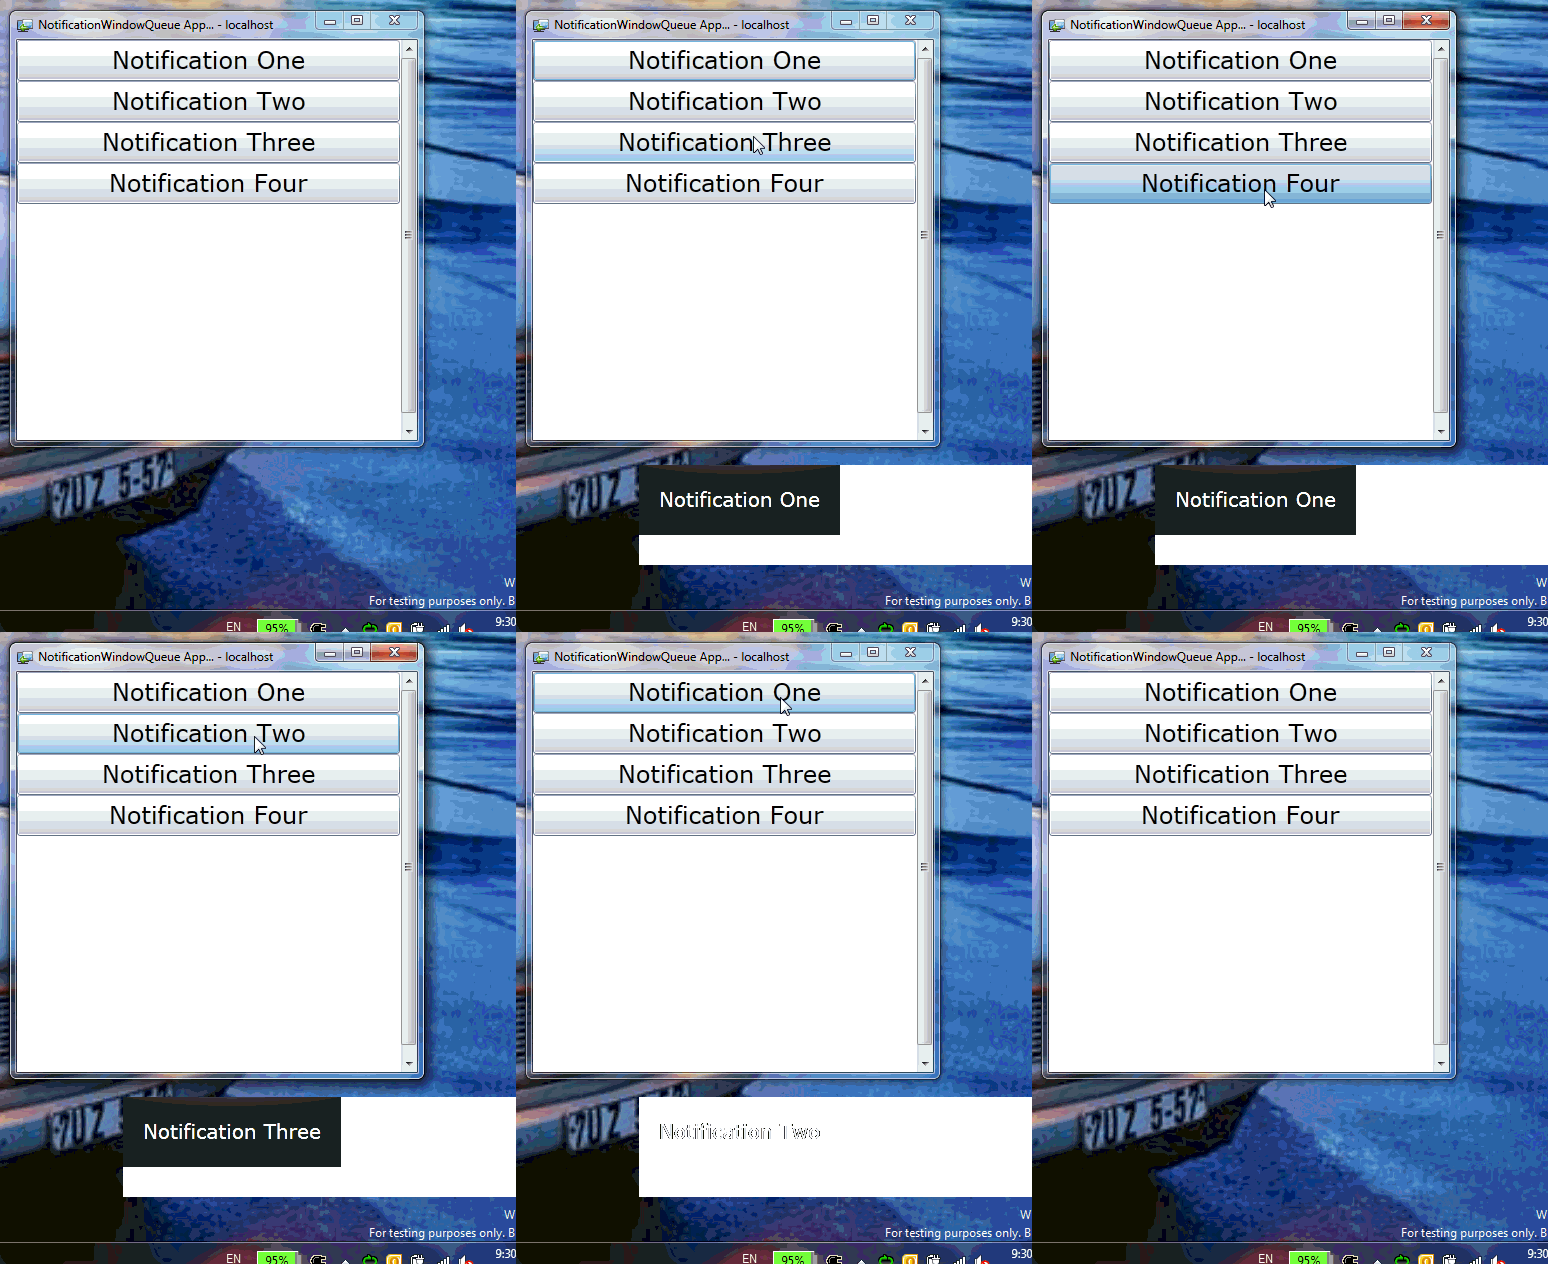
The end result is that we are essentially queuing up our notification windows.  Here’s a simple result of the code running (animated image):

NotificationWindow Queue demonstration

You can download the full code here: NotificationWindowQueue_CS.zip (C#) or NotificationWindowQueue_VB.zip (Visual Basic).  Remember, that NotificationWindow requires the application to run in Out-of-browser mode, so be sure to install it first!  Also, this requires Visual Studio 2010 and Silverlight 4 development tools to run.

This concept might come in useful for business applications where different functions (perhaps things out of view) need to notify the user of certain things.  Hope this helps think outside the box a little bit!

If you’ve been working with Visual Studio 2008, Expression Blend 3 and Silverlight (or WPF) development, you’ve likely used the Open in Expression Blend feature in Visual Studio.  This occurs when you right-click on a XAML file in your project/solution and you’ll see that option as long as you have Expression Blend 3 installed.

Well…if you are an eager developer and have installed VS2010 and the Blend Preview for .NET 4, you may have noticed that integration broken.

Problem 1: VS2010 and Blend Preview for .NET 4 on a clean box – NO LINK

You’ve just fired up a new virtual PC or you have a clean install and you’ve installed Visual Studio 2010, the Silverlight 4 tools and Blend Preview for .NET 4.  You start your new XAML development project, add some code, then want to use Blend.  You right-click and see this:

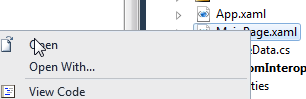
Missing Open in Blend option

Nothing.  No option.  You miss that convenience of immediately opening the solution/file from VS to Blend and want it back.  You are confused because you have both installed!

Problem 2: VS2010 shows me the link, but it opens in Expression Blend 3

The other problem you may face is that you have VS2010, Blend 3 and Blend Preview for .NET 4 installed.  You see the Open in Expression Blend option, but when you click on it expecting it to open the latest Blend, it opens your VS2010 project in Blend 3 (or tries to) and fails.  You want to change this to open in Blend Preview for .NET 4.

Solution

I have a solution for you and luckily it is a fairly easy one. 

First, a warning that “here be dragons” – this is a registry editing procedure.  If you aren’t familiar with editing your registry, or don’t know what it is (highly unlikely), then you shouldn’t be doing this.  Screwing up your registry can cause irreparable damage and may harm small kittens in the process.  Seriously, you’ve been warned so don’t email me if your machine explodes into a pile of dust.  Hey, it works on my machine.

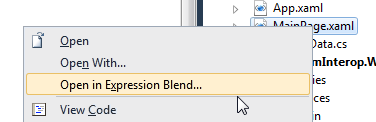
With the warning aside, here’s the fix.  Basically Visual Studio looks for a specific key in the HKLM (that’s HKEY_LOCAL_MACHINE to you registry noobs) for where to launch Expression Blend.  There is only one setting though, so this will apply for any VS instance you have installed.  Once you implement the registry setting you’ll see the option:

Open in Blend from Visual Studio

It is located in HKLM\Software\Microsoft\Expression\Blend – there is a key that VS is looking for there named “VS” with one String value named “BlendLaunchPath” which has the full path to the version of Expression Blend you want to launch.

   1: [HKEY_LOCAL_MACHINE\SOFTWARE\Microsoft\Expression\Blend\VS]
   2: "BlendLaunchPath"="\"c:\\Program Files\\Microsoft Expression\\Blend Preview for .NET 4\\Blend.exe\""

So if you are missing the link or want to change the link that exists (because you are running Blend 3 and Blend Preview for .NET 4 side-by-side – which can be done if you didn’t know that) all you have to do is change that path.

Works on my machine logoI’m providing a ZIP file of the registry file you can merge (a .REG file) for both 32-bit or 64-bit (x64 is in the Wow6432Node) that will automatically add this setting for you assuming you have Blend Preview for .NET 4 installed in the default location.  You can get that ZIP file here: OpenInBlendRegHack.zip.
Hopefully this is a helpful little tip for you if you want to implement this integration between the beta of VS and the preview of Blend.  I use this integration a lot and it’s nice to have it working with the new tools and not miss anything.  REMINDER: Changing this registry change makes it changed for both VS2010 and VS2008...be warned.  Hope this helps!


This work is licensed under a Creative Commons Attribution By license.

Last week, the Silverlight 4 beta release included the Silverlight 4 Tools for Visual Studio 2010.  This single installer would perform the following (assuming you had either Visual Studio 2010 or Visual Web Developer Express 2010 already installed:

  • Install a Visual Studio 2010 service pack (KB976272)
  • Install Silverlight 4 Windows developer runtime (4.0.1108.0)
  • Install Silverlight 4 SDK
  • Install WCF RIA Services (November 2009)

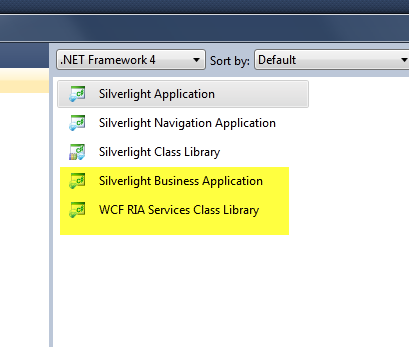
That is all you really needed.  But some may have had an experience afterwards of launching VS2010 and *NOT* seeing the WCF RIA Services Class Library or Silverlight Business Application templates:

WCF RIA Services Templates in VS2010

What is happening here is that likely you already had a version of .NET RIA Services (likely the July 2009 CTP) installed.  The Silverlight tools installer silently failed and just kept going.

If you don’t see the WCF RIA Services Templates…

If you don’t see the WCF RIA Services templates, make sure Visual Studio 2010 and Visual Studio 2008 are both shutdown and perform the following:

  • Go to the Add/Remove Programs control panel application and locate .NET RIA Services.  Select the item and uninstall it.  This will remove the previous July CTP of the artist formerly known as .NET RIA Services.
  • Re-run the Silverlight Tools for Visual Studio 2010 installer.  This will re-install the items and ensure that RIA Services is properly installed
    • Optionally you can extract the RIAServices.msi installer by running the tools installer with the /x:<folder> switch which will extract the contents.

After performing the above, you should now see the WCF RIA Services templates and should be working fine.

So, what happened?  Why no fail log?!

We did say beta right? :-) -- In all seriousness, we wanted to ensure that the WCF RIA Services bits got in the tools installer and knew this little inconvenience might creep up for some.  Apologies for the inconvenience.  There also exists no logging of the failure to indicate that there was anything wrong and to assist you in knowing the situation.

This is being fixed in a future installer to detect a previous install of RIA Services and alert the user (or we may even force uninstall it…not sure yet). 

But wait, RIA Services isn’t working in my Visual Studio 2008 environment now!

That’s right.  If you install RIA Services for Silverlight 4/Visual Studio 2010, it isn’t going to work in your Visual Studio 2008 environment.  If you want to work on RIA Services with Silverlight 3 and Visual Studio 2008, then you need to stick with the WCF RIA Services for VS2008 version.

Bottom line: RIA Services does not install side-by-side.

All of this information is provided to you on the WCF RIA Services web site.  The first section explains the bits you need for each environment.

Hopefully this helps clear some confusion.  Yes, I know it is frustrating not getting an error and not seeing things work.  We’re working to solve that (doesn’t help you now, I know) in future setups and make sure the release tools installer does the right thing.  It’s during these beta periods we can help identify such issues to make sure we fix them before release.

If you have questions on WCF RIA Services, be sure to head to the forums where the team is listening!

Hope this helps!

Well, PDC09 is over and it was a blast.  What a relief it is to finally be able to show the world what the Silverlight team has been working on since Silverlight 3.  Based on the feedback at the conference, people are excited to dig into the new bits and start building solutions. 

As a round-up of resources from PDC, I’m putting some of my favorites here.

Video Content

For some of the PDC09 key Silverlight sessions, these are what I recommend:

  • CL01 – Microsoft Silverlight 4 Overview (Karen Corby)
  • CL02 – Silverlight 3 Advanced Performance and Profiling (Seema Ramchandani)
  • CL06 – Networking and Web Services (Yavor Georgiev)
  • CL07 – Mastering WCF RIA Services (Dinesh Kulkarni)
  • CL19 – Building Line of Business Applications with Silverlight 4 (David Poll)
  • CL20 – Improving and Extending the Sandbox with Silverlight 4 (Joe Stegman)
  • CL21 – Building Line of Business Applications with Silverlight and RIA Services (Brad Abrams)
  • CL22 – Advanced Topics for Building Large-scale Applications with Silverlight (John Papa)
  • CL24 – XAML Futures in Microsoft .NET Framework (Rob Relyea)
  • CL32 – Developing Testable Silverlight Applications (Keith Jones)
  • CL08 – Custom Behaviors for Advanced Microsoft Silverlight UI Effects (Peter Blois)
  • CL36 – Deep Dive on Bing maps Silverlight Control (Keith Kinnan)
  • PR03 – Integrate Microsoft Silverlight with SharePoint 2010 (Paul Stubbs)
  • FT24 – Building Extensible RIAs with Managed Extensibility Framework (Glenn Block)

These would be my “not miss” ones for Silverlight.  To help you get the videos faster, I’ve cooked up a few helpful links:

  • WMV Podcast RSS Feed (for Zune or other WMV players) – this is the WMV hi-res videos
  • iTunes/iPod Podcast RSS Feed – this is MP4 format so you can use it for any MP4 player.  As of the writing of this post, the MP4 encoding wasn’t done yet, but if you subscribe here you’ll get them when they are.
  • Windows Media Center playlist – want the 10-foot experience?  Here’s a set of playlist files for Windows Media Center.  Unzip the folder in your Public Videos folder for Media Center (or wherever you have your video content discoverable).  These point to the same hi-res videos that you would watch online.

I hope that helps get the most out of the video content for Silverlight.

Blog Content

There was some great blogging going on in the flurry of PDC and Silverlight 4 announcements as well.  Here are some I wanted to ensure you saw:

These were some of the highlights I wanted to call out.

Learning Resources

In case you missed the links in my guide post to Silverlight 4, there are 17 videos and code downloads that were launched for Silverlight 4.  In addition here’s some other resources:

Hopefully this should all get you started.  PDC was great.  Launching Silverlight 4 beta was awesome and I was able to talk to a lot of folks and get even more feedback for our requested features and what people are thinking about them.  Trust me your feedback will make it’s way back to the overall Silverlight team to see how people are using and planning to use the new features!